The wheel arches are one of the most rust-prone areas of the AE86, and a good repair is difficult. That is why I documented my repair approach here to show you how I’ve done it, and give you some inspiration.

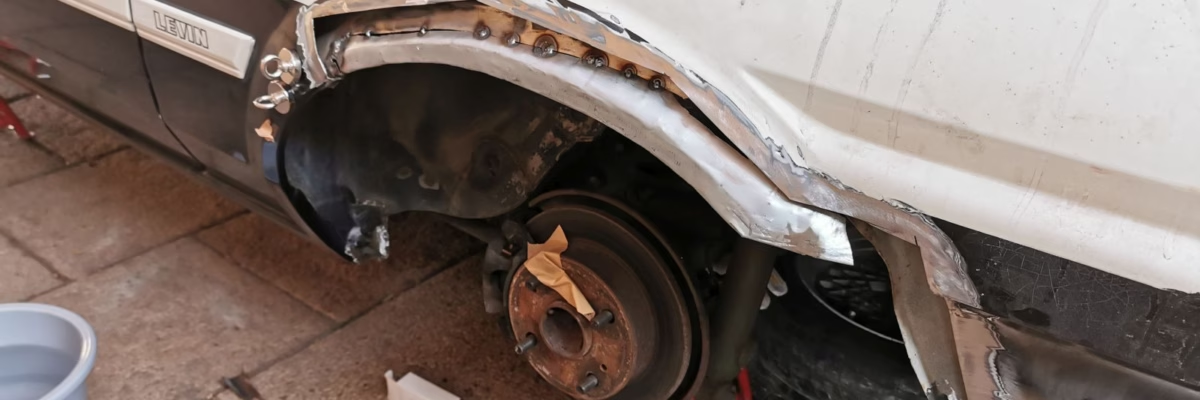
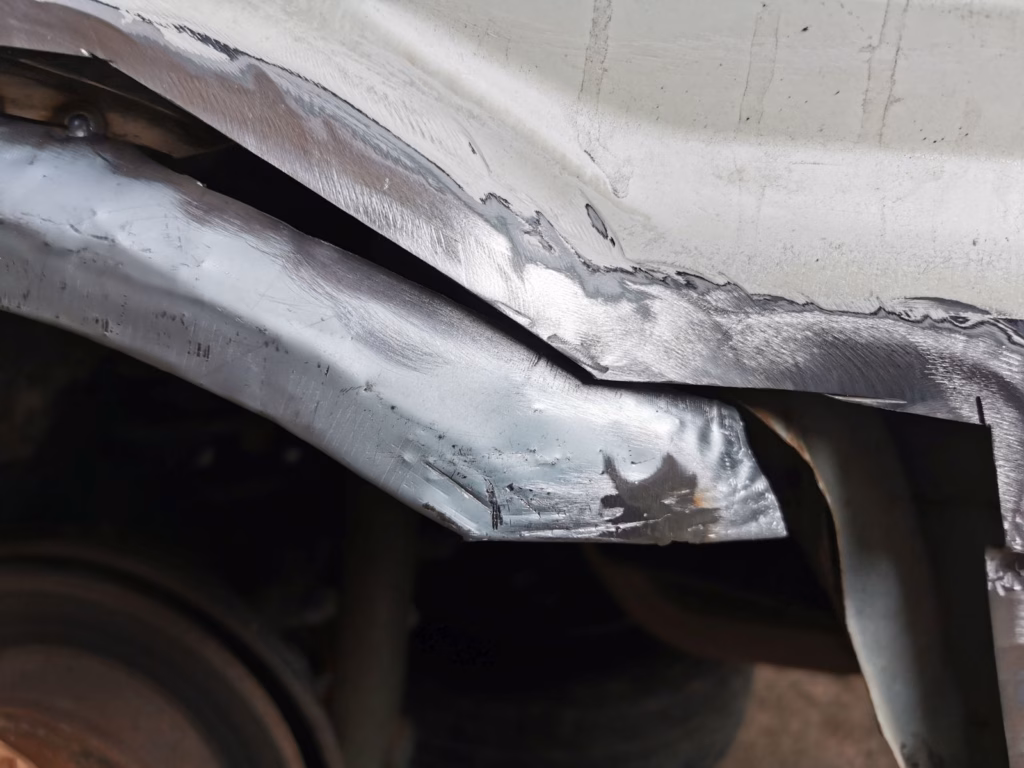
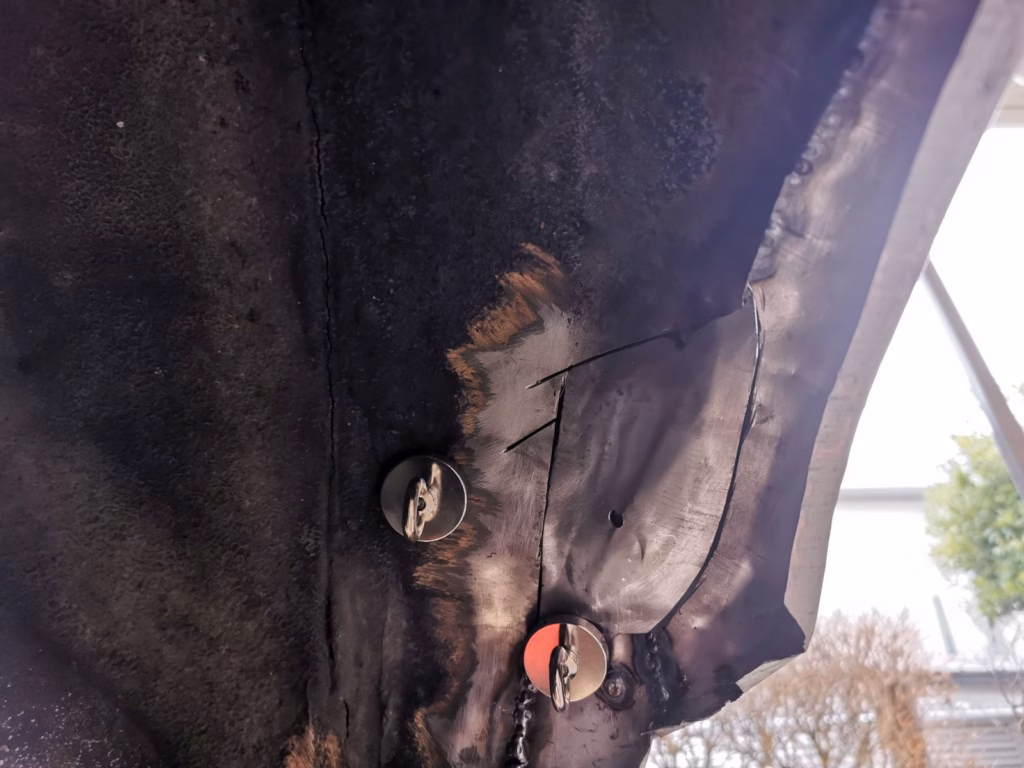
On my Levin, on a superficial look, the wheel arches looked great. It did not seem like there was a lot of rust. In fact, the right arch was still in good condition, but the left one was extremely bad. The outer visible portion of the quarter panel had only minimum visible rust on the outside, and even after scrubbing it, only two minor rust holes appeared.
At First Glance, It Doesn’t Look Too Bad
Looking at the inside of the wheel arch was where the misery was hidden, so I masked off the paint and started cutting out the pretty quarter panel. To fix this properly, the outer wheel arch needs to be removed to allow proper access.

I tried to keep the cuts within the black area of the two-tone paint to avoid having to repaint the car.
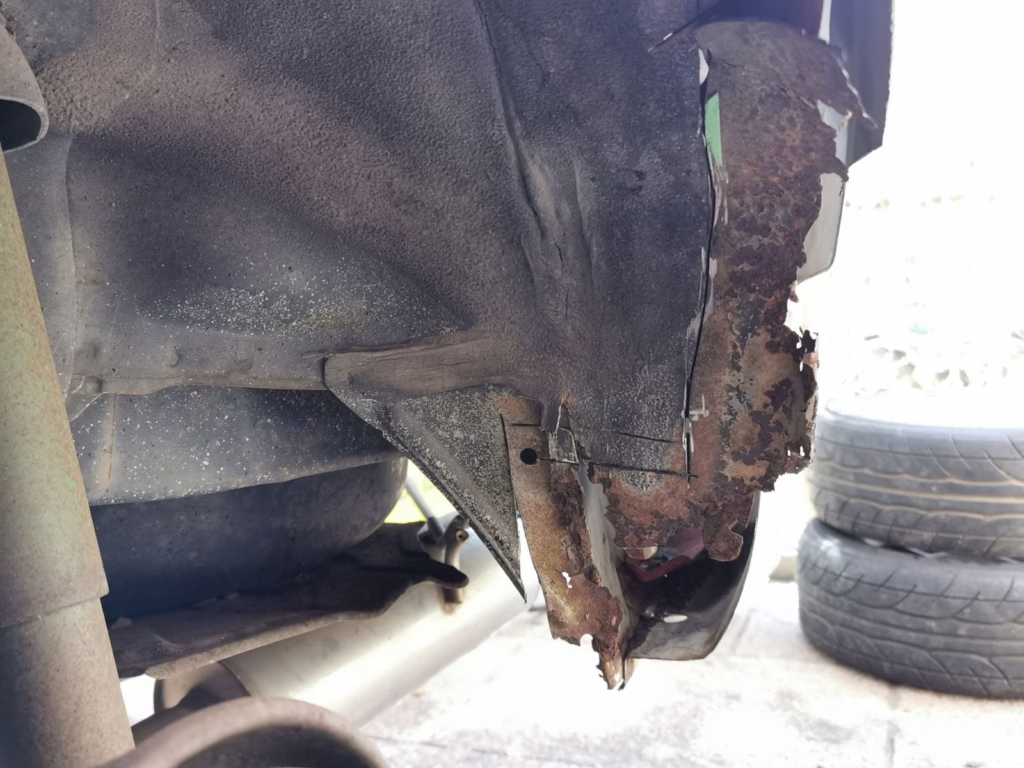
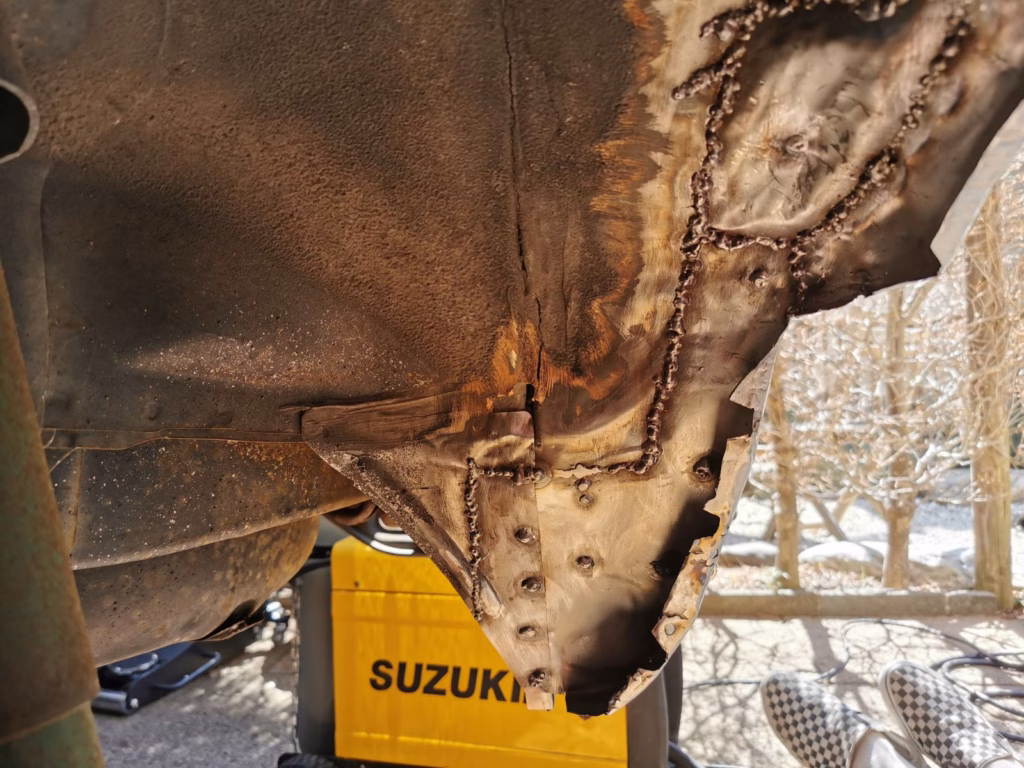
Revealing The Misery
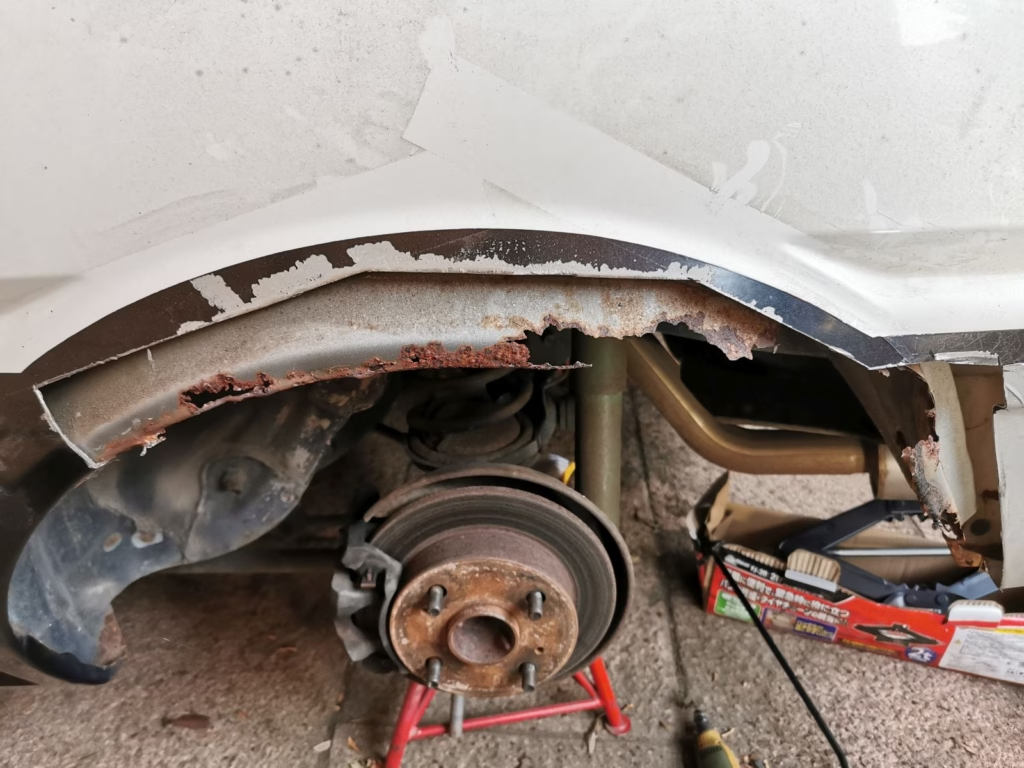
While the outside still looked great, large parts of the inner wheel arch was rotten. Most part of the inner wheel arch were missing or weakened. At the part where the bumper was mounted to, road dirt and rain water entered the trunk through a fist-sized hole.
Unfortunately, the inner wheel arch is not available as a reproduction piece, so I had to fabricate it myself. The tools that were most useful here were:
- A metalwork hammer and a sand bag. A sand bag allows you to hammer the metal in any shape, and is great for long, rounded pieces.
- A stretch/shrink machine. It makes it much easier to have tight curves in the metal.
- Hand seam bending pliers, useful for 90 degree seams.
- Magnets to ensure the metal sheets are attached and level. I’ve recently learned about butt weld clamps, which I would use if I had to do this work again.
Inner Wheel Arches
After cutting out all the rotten metal, I used milk cardboard boxes and duct tape to approximate the shape of the repair piece using cardboard. After I was satisfied with the shape, I transferred it onto a 0.8mm steel sheet, cut it out, and used above tools to carefully bend it in shape.
The inner wheel arch was too large to be made out of one piece. In the end, I recreated the inner wheel arch using three separate repair pieces.
You need to have the outer wheel arch ready to test-fit the positioning and width of the inner wheel arch. In the end, the inner and outer arch must fit perfectly. If you are not doing this job properly, you will gaps or the outer panel may not fit at all. Preparation is all that matters.

You can see that I also did not manage to perfectly replicate the shape of the original wheel arch, as the repair piece is a bit flatter. However, I took great care that the width is correct, and the outer radius matches the outer quarter panel.
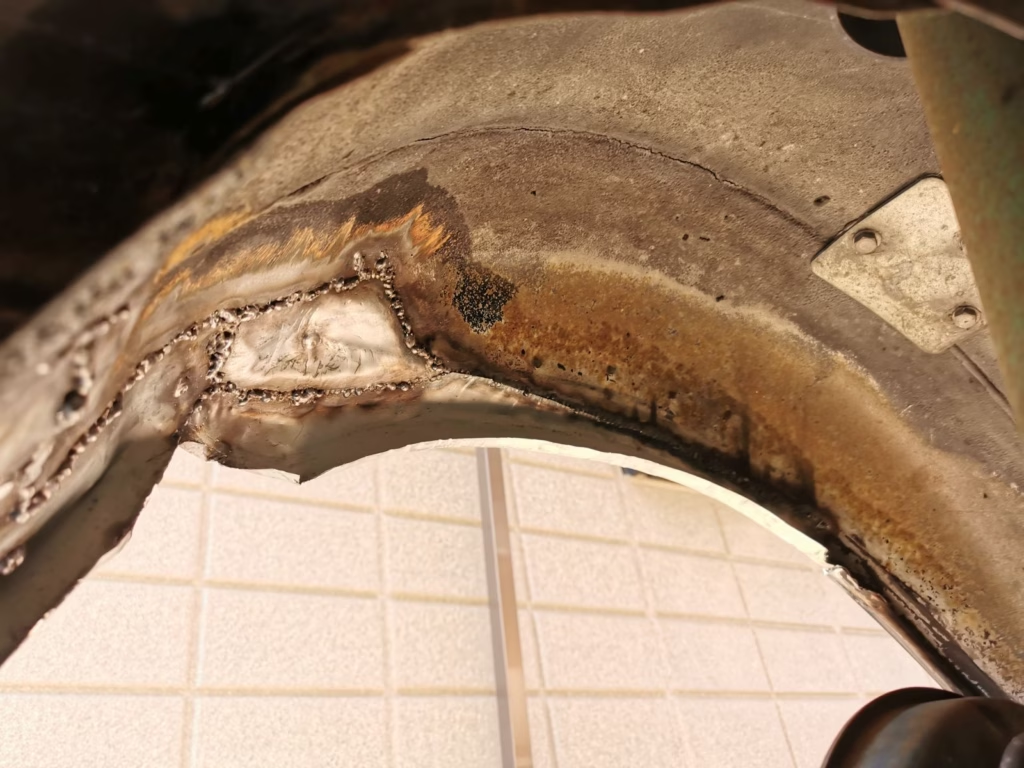
The end area of the pockets is a rather straight shape, and fabricating the repair pieces at the bottom inner wheel arch was a bit easier. The pockets themselves were still in acceptable condition, and I decided to not cut any further.
Work has started on the second repair piece for the bottom inner wheel arch. Getting the inner fender to perfectly align with the outer fender was challenging.
Bottom inner side repair completed.
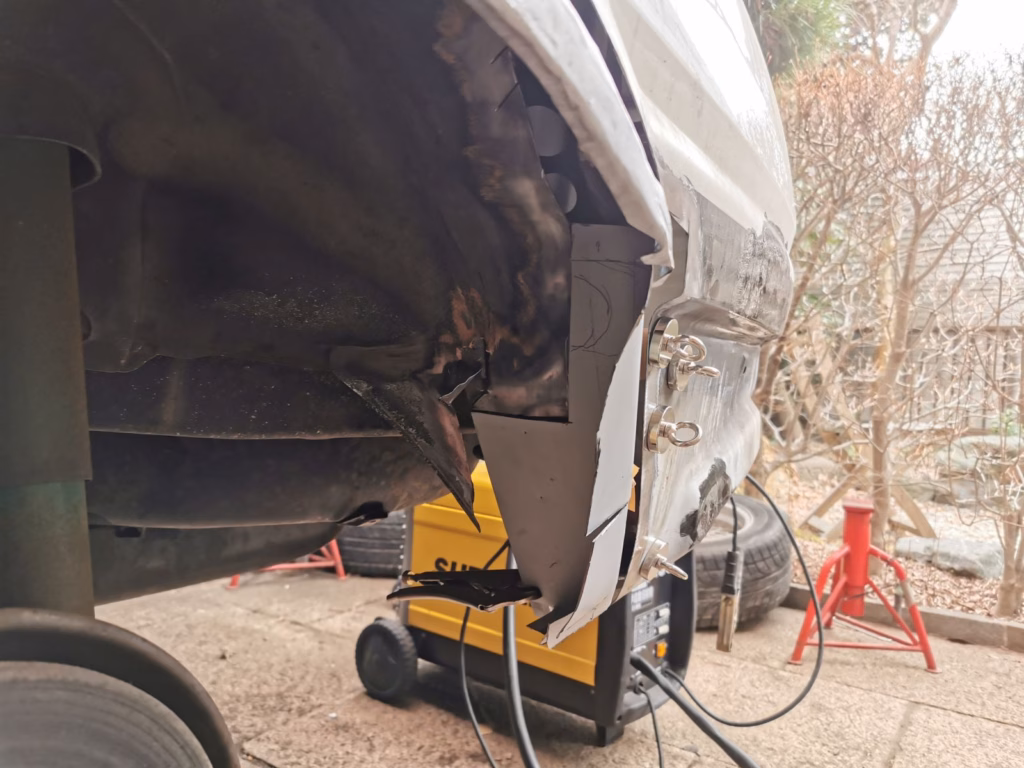
Outer Wheel Arches

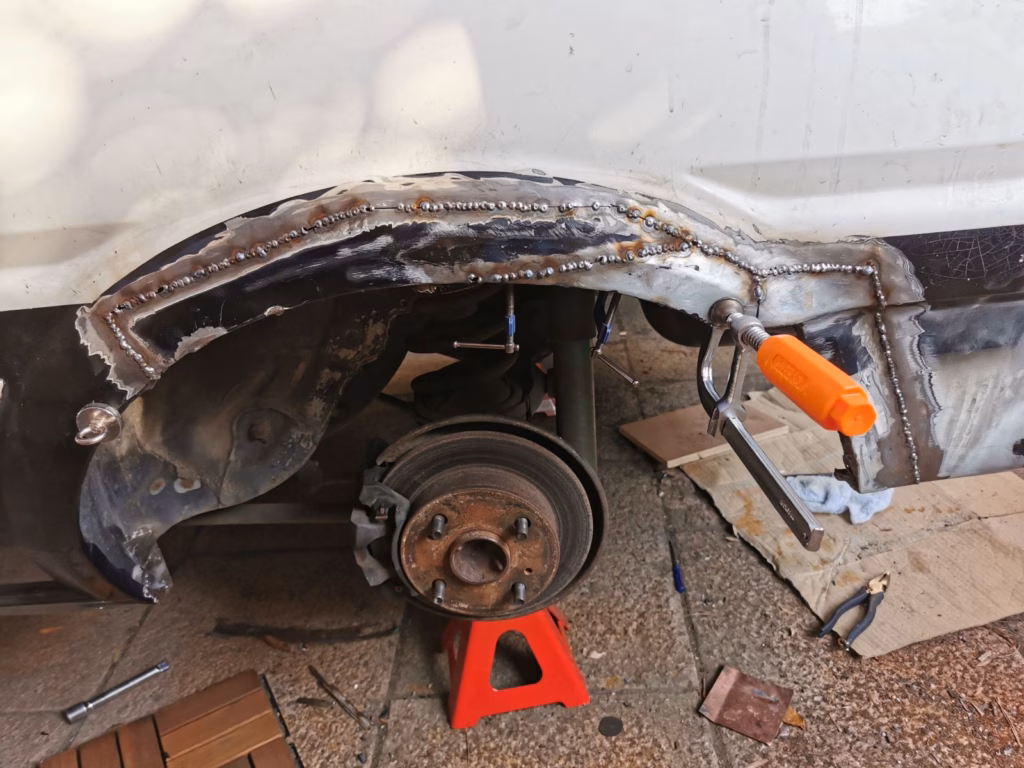
After the metalwork on the inner fender was completed, I painted it. Before attaching the outer sheet, I also applied Sikaflex body panel adhesive to strengthen the connection, noise isolation and sealing between the inner and outer fender.
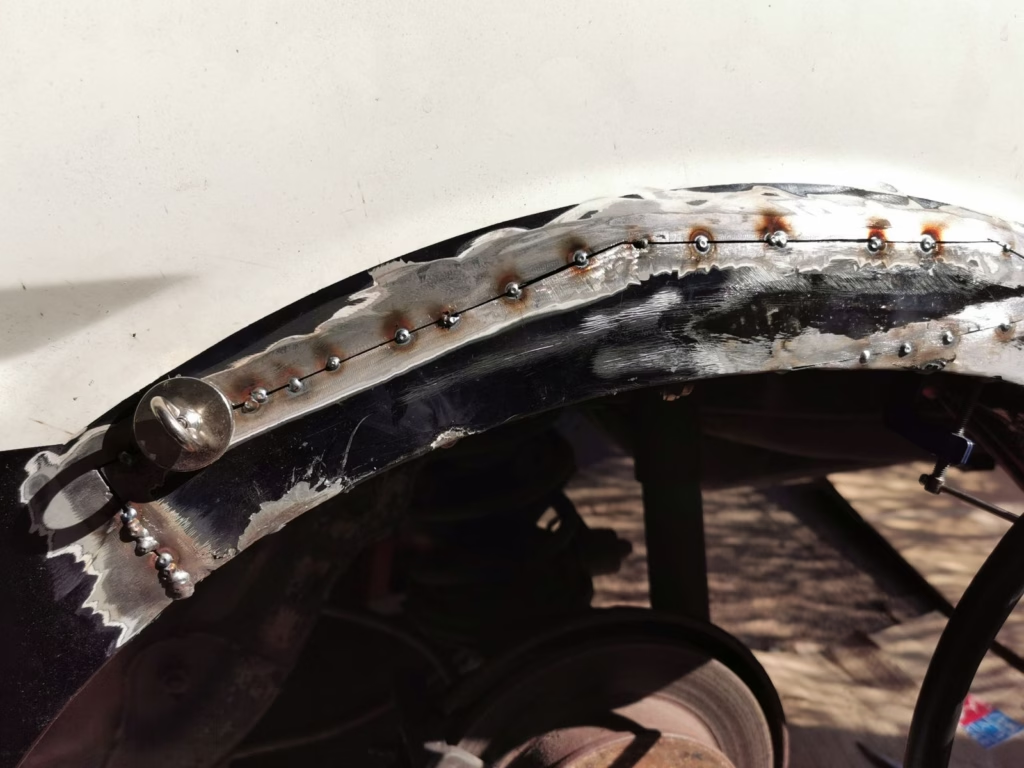
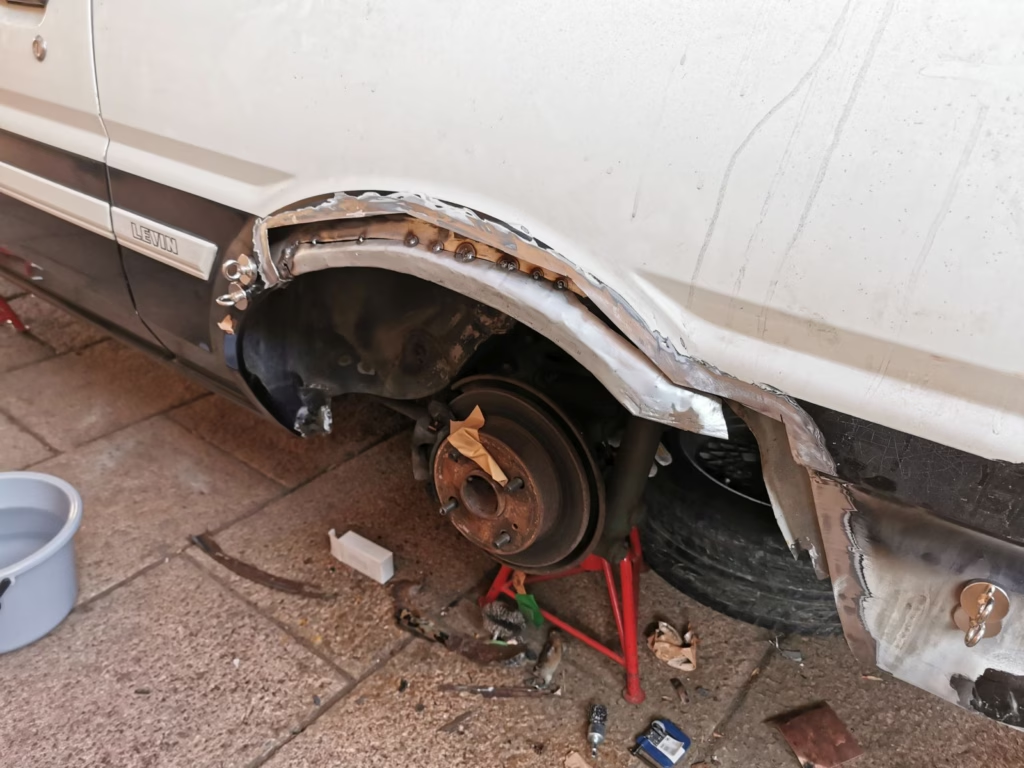
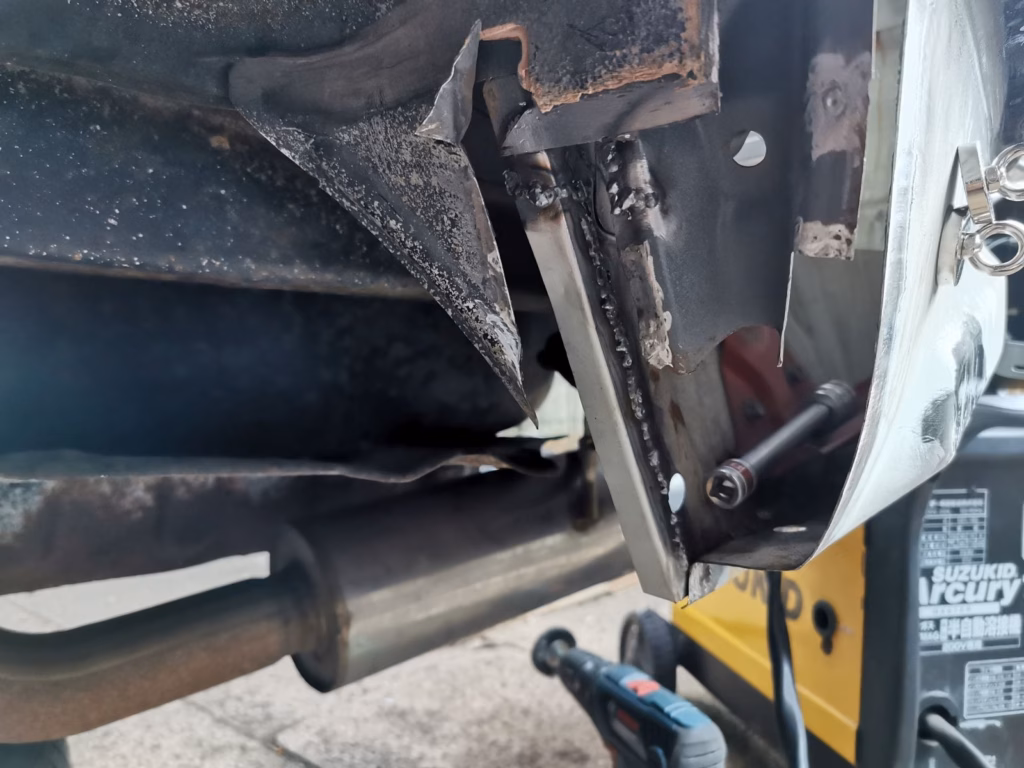
The outer wheel arch in the process of being welded on. I used magnets to ensure the butt welds are level. Similar to OEM, the outer and inner wheel arch are welded together using spot welds on the bottom seam.
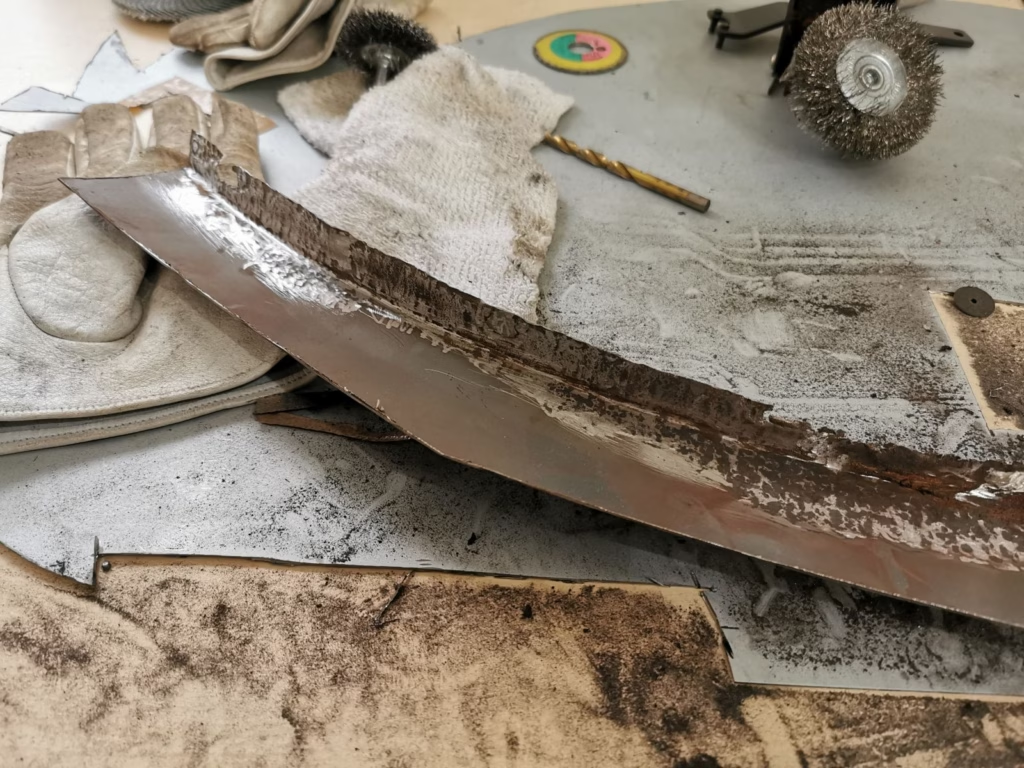
The welding work is now almost completed. The outer wheel arch was made using three parts: the left and right piece are still the original metal that I put back after removing the surface rust, and the middle part was fabricated. I did not use a repair piece.
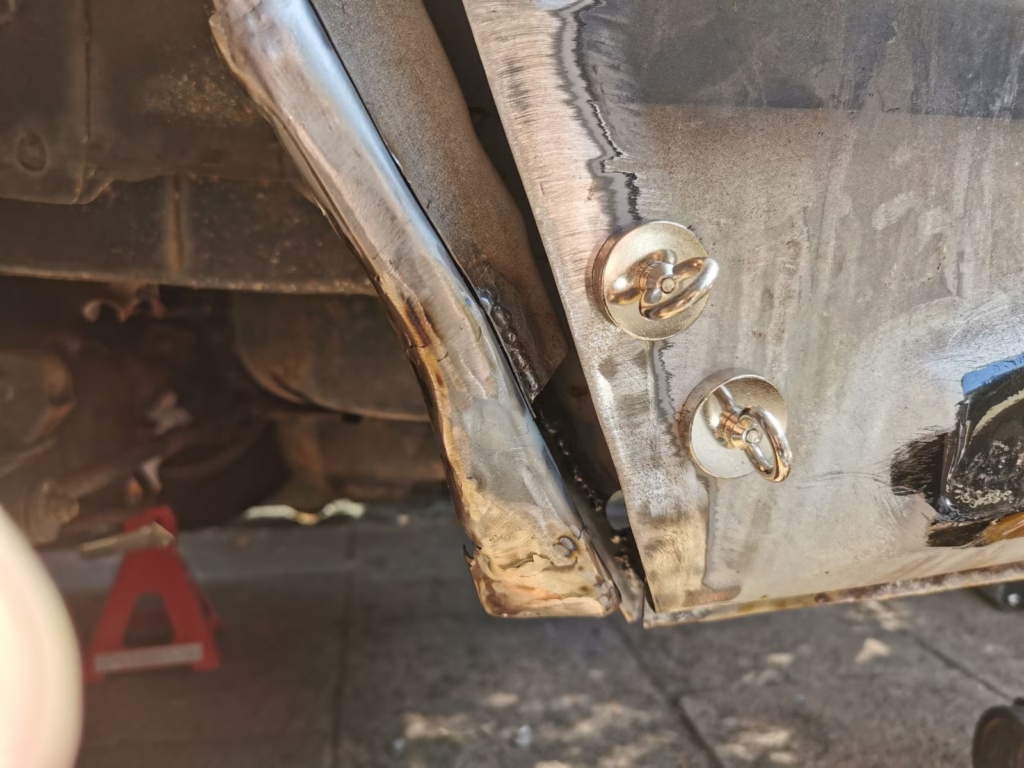
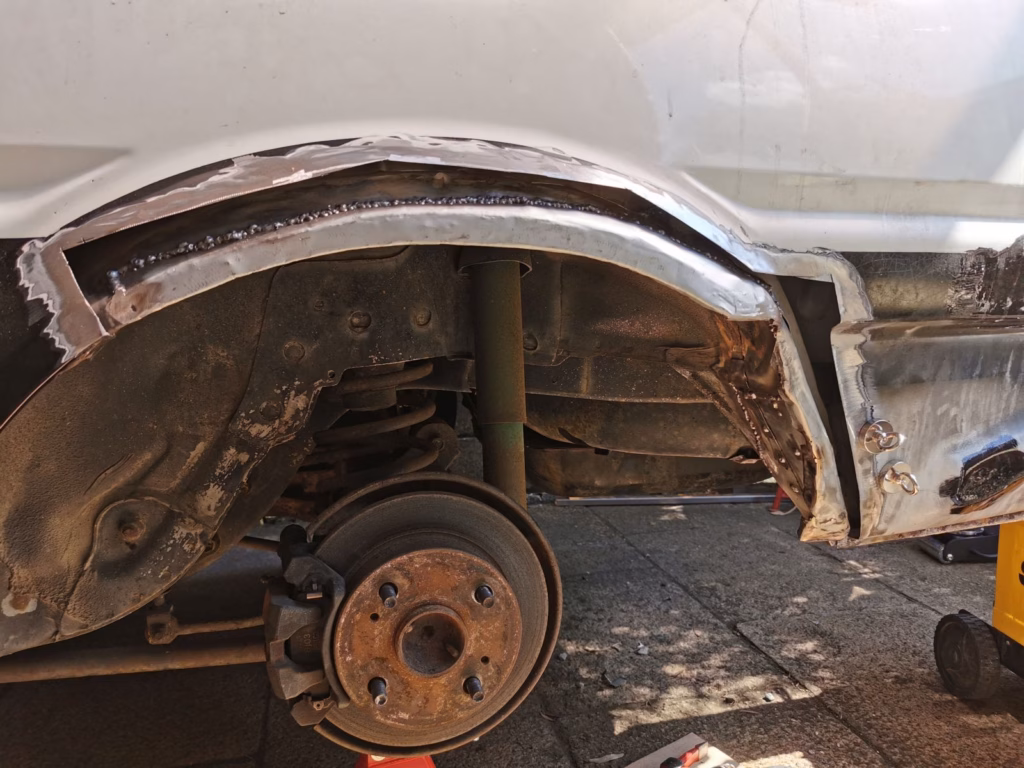
Finished Result
After the welding work was completed, I used corrosion protection grease to seal the cavity on the inside. I usually use Mike Sanders for this, but it is not available in Japan. I therefore used a homemade solution (90/10 mix of Vaseline and bee wax). Since this is mostly clean and new metal, regular cavity wax would also work.
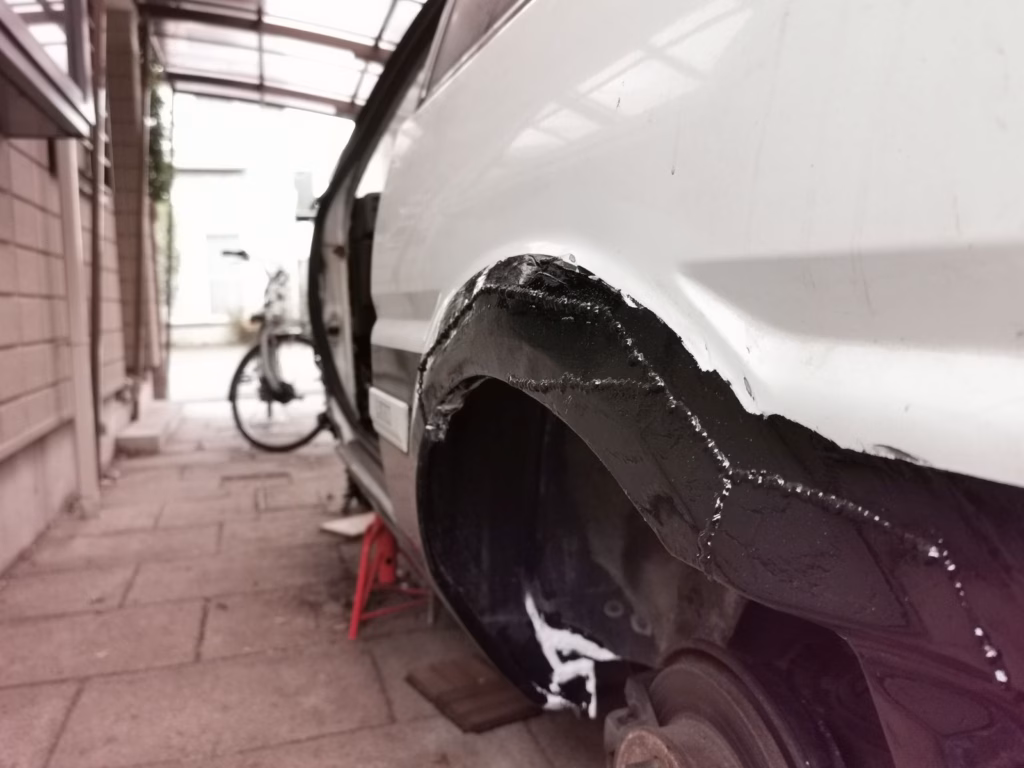
All that’s still left to do is to grind down the welds, a thin layer of body filler, and a local respray.