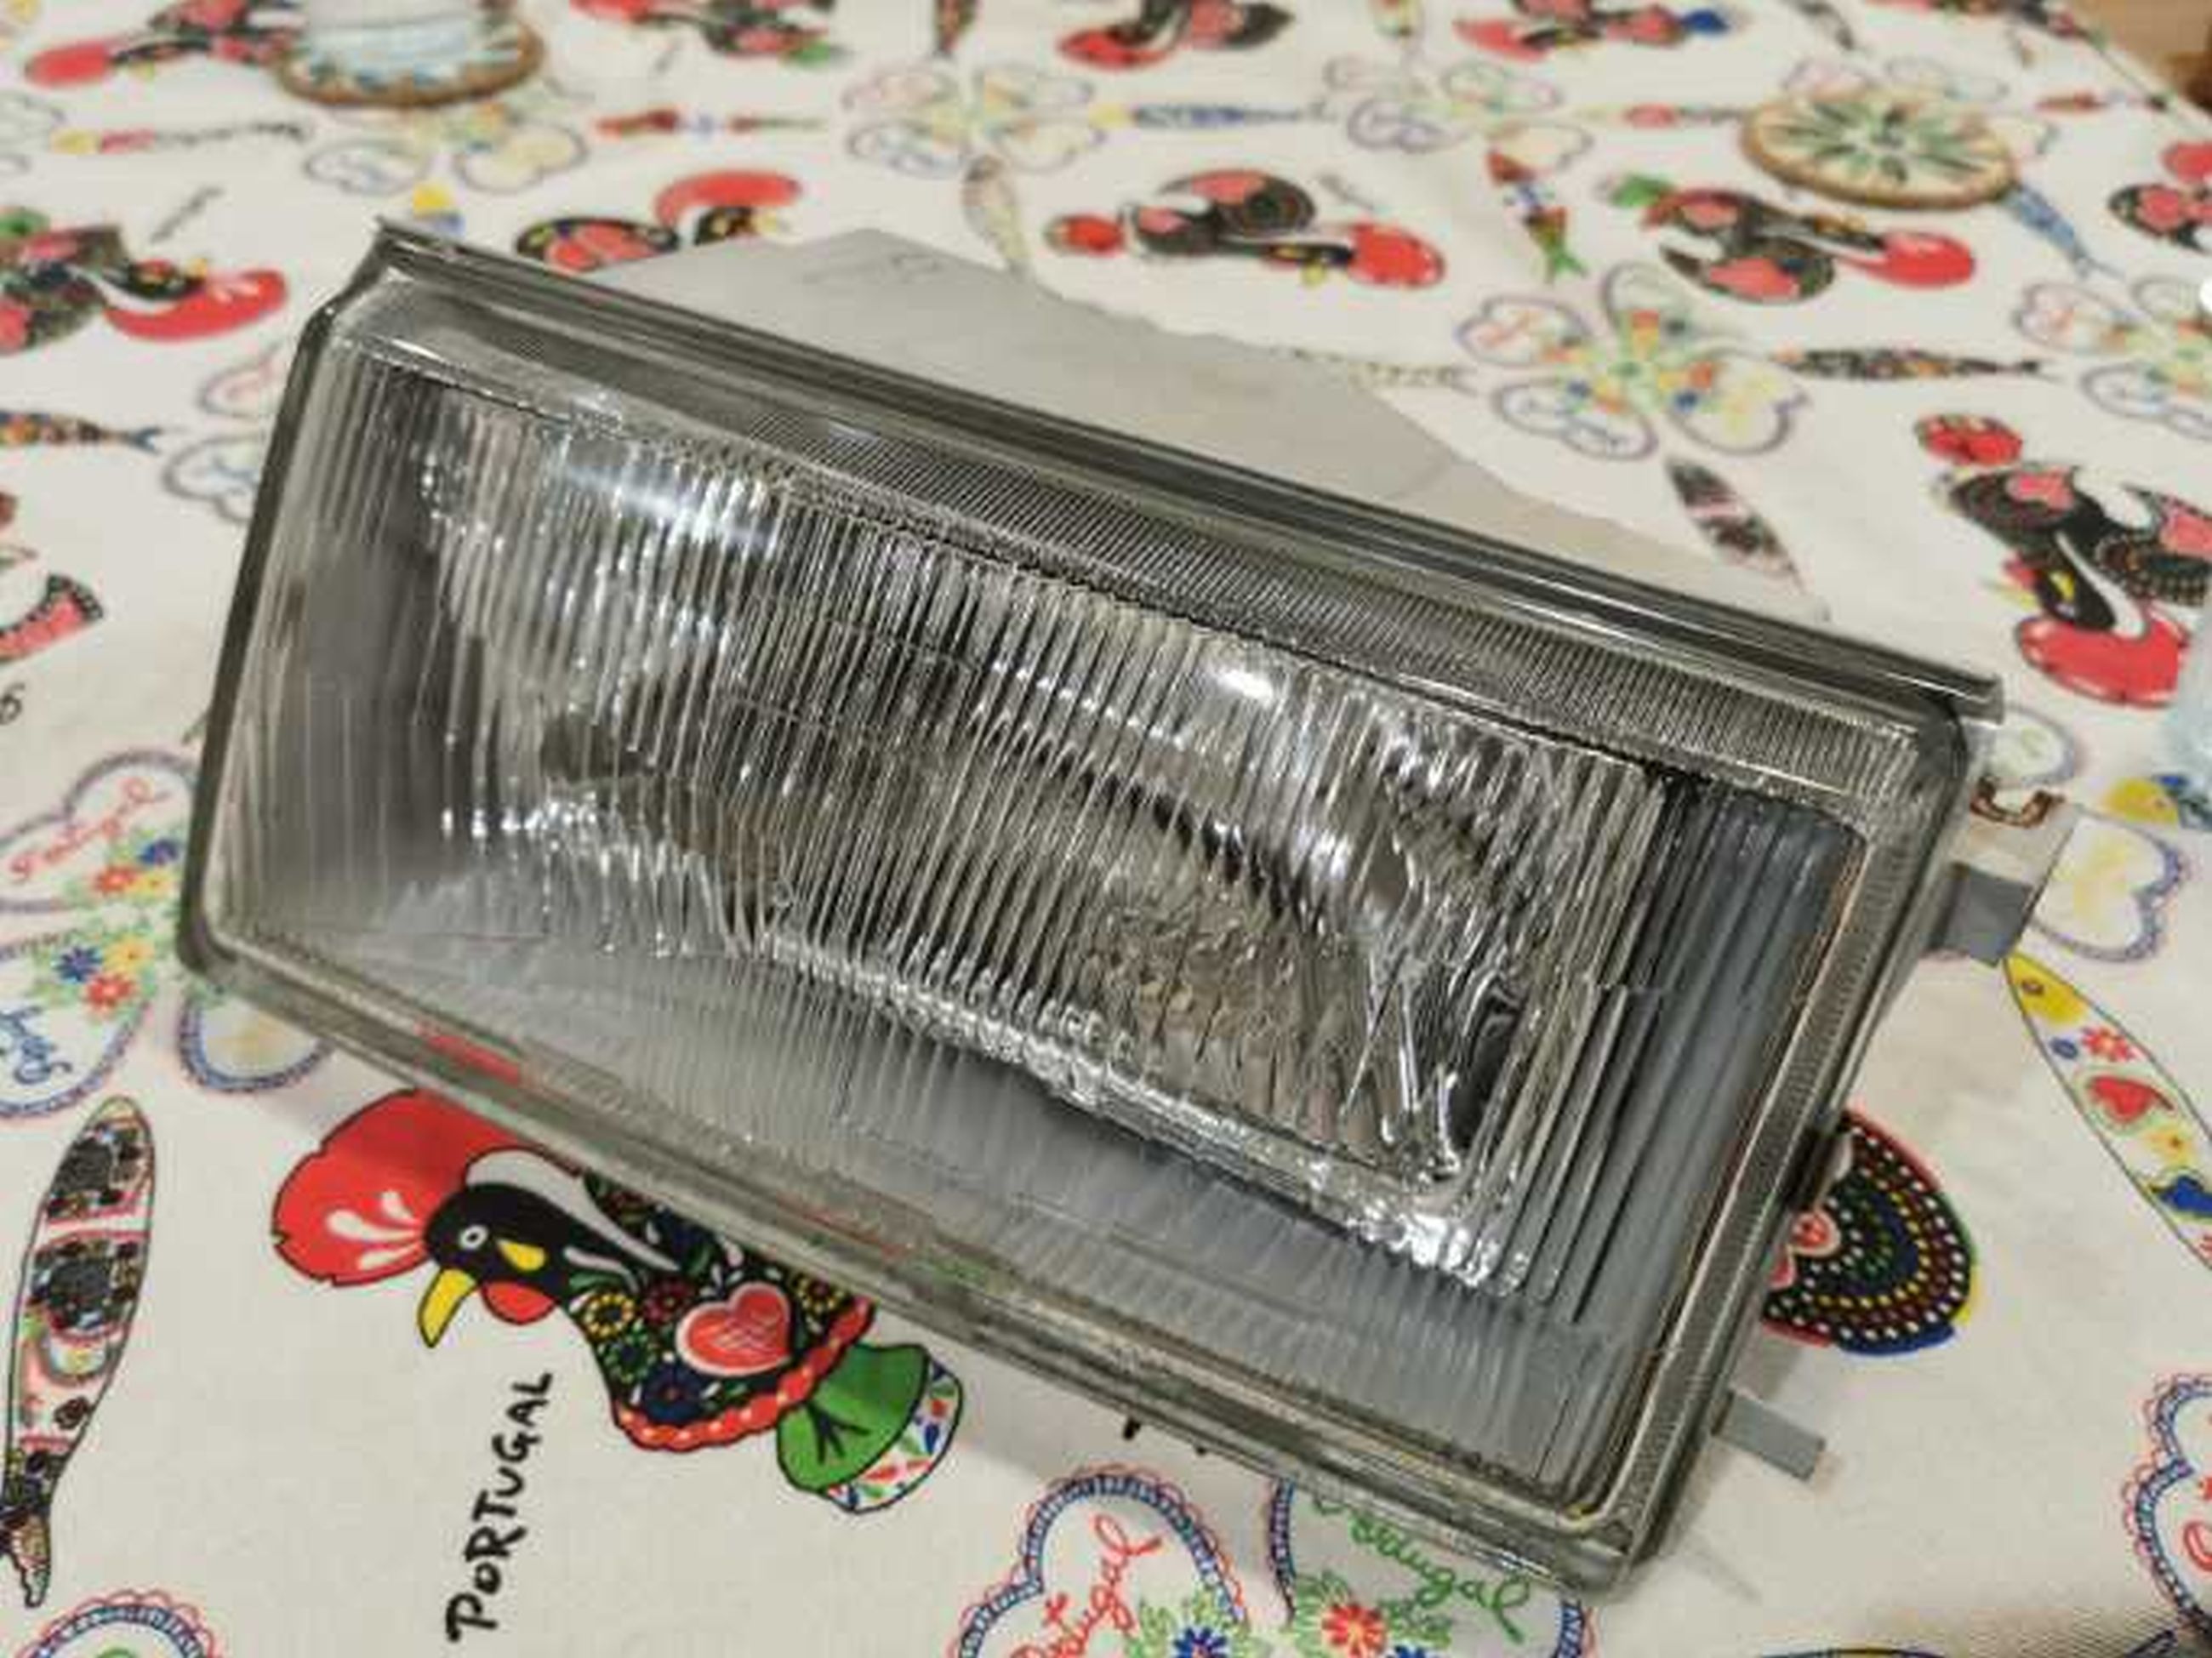
The headlights on my Levin were in terrible condition. The adjustment screws didn’t work, the lights were not aligned, and the light yield was terrible. I decided to rebuild them.
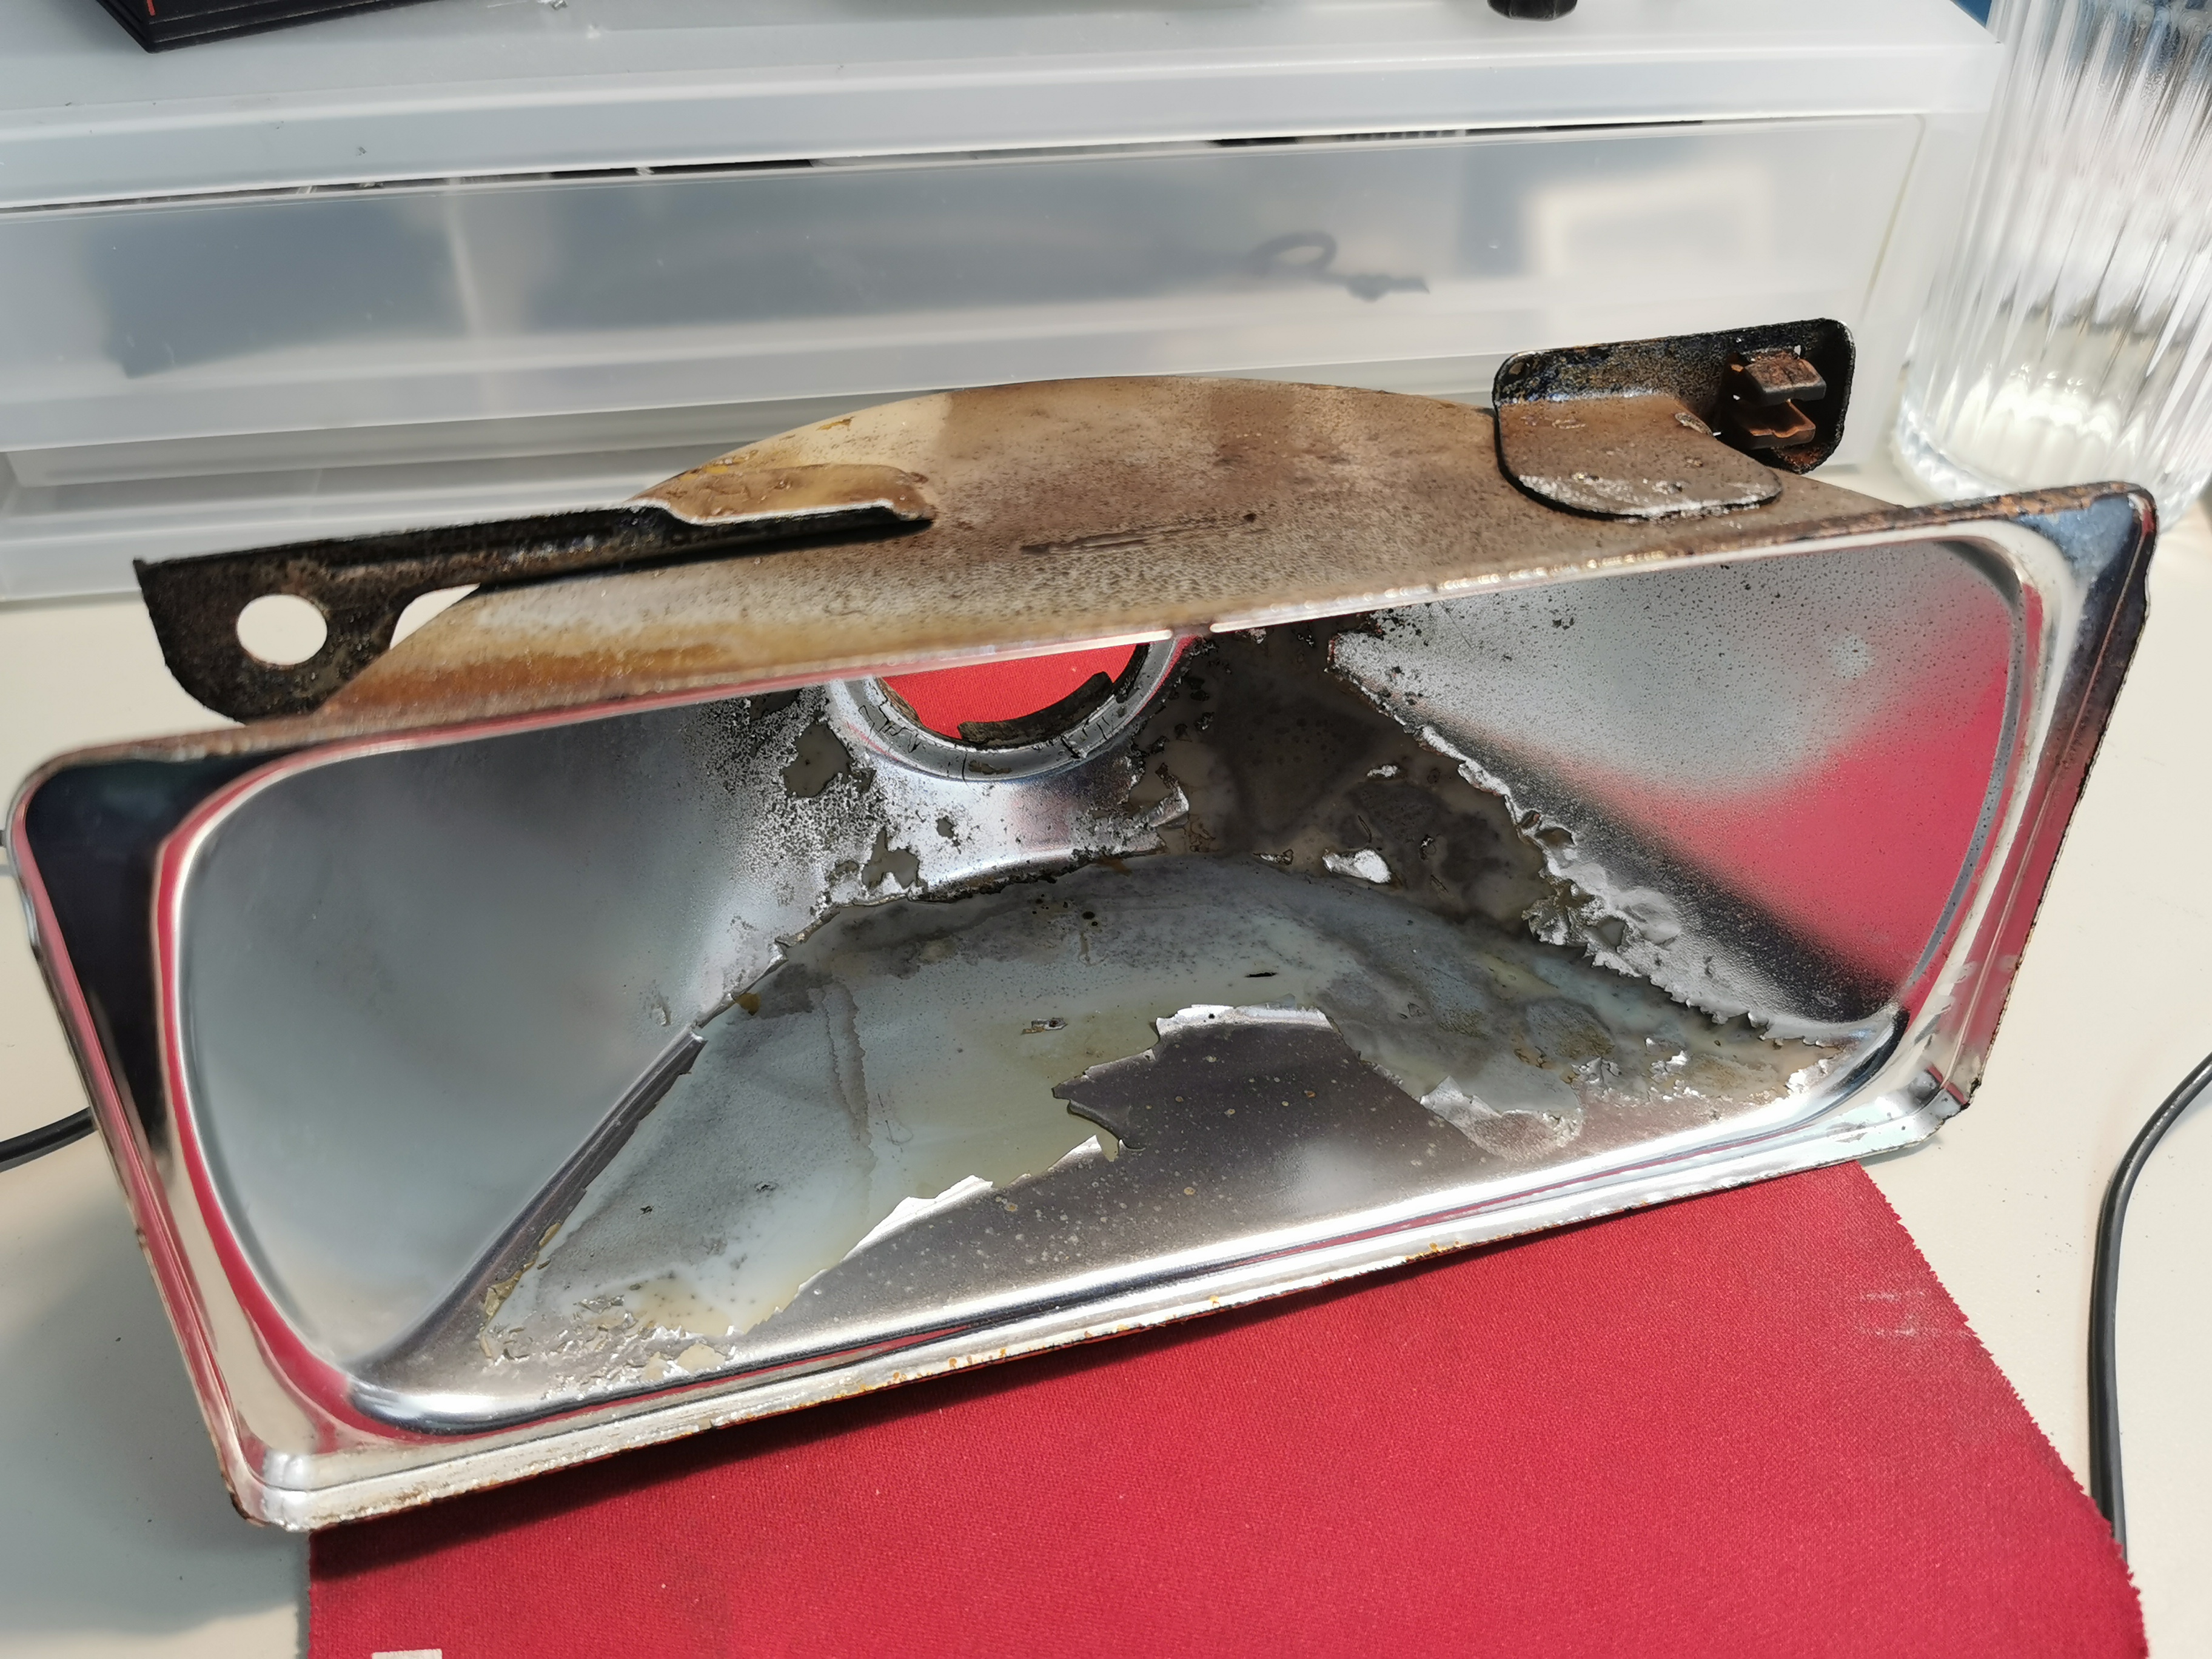
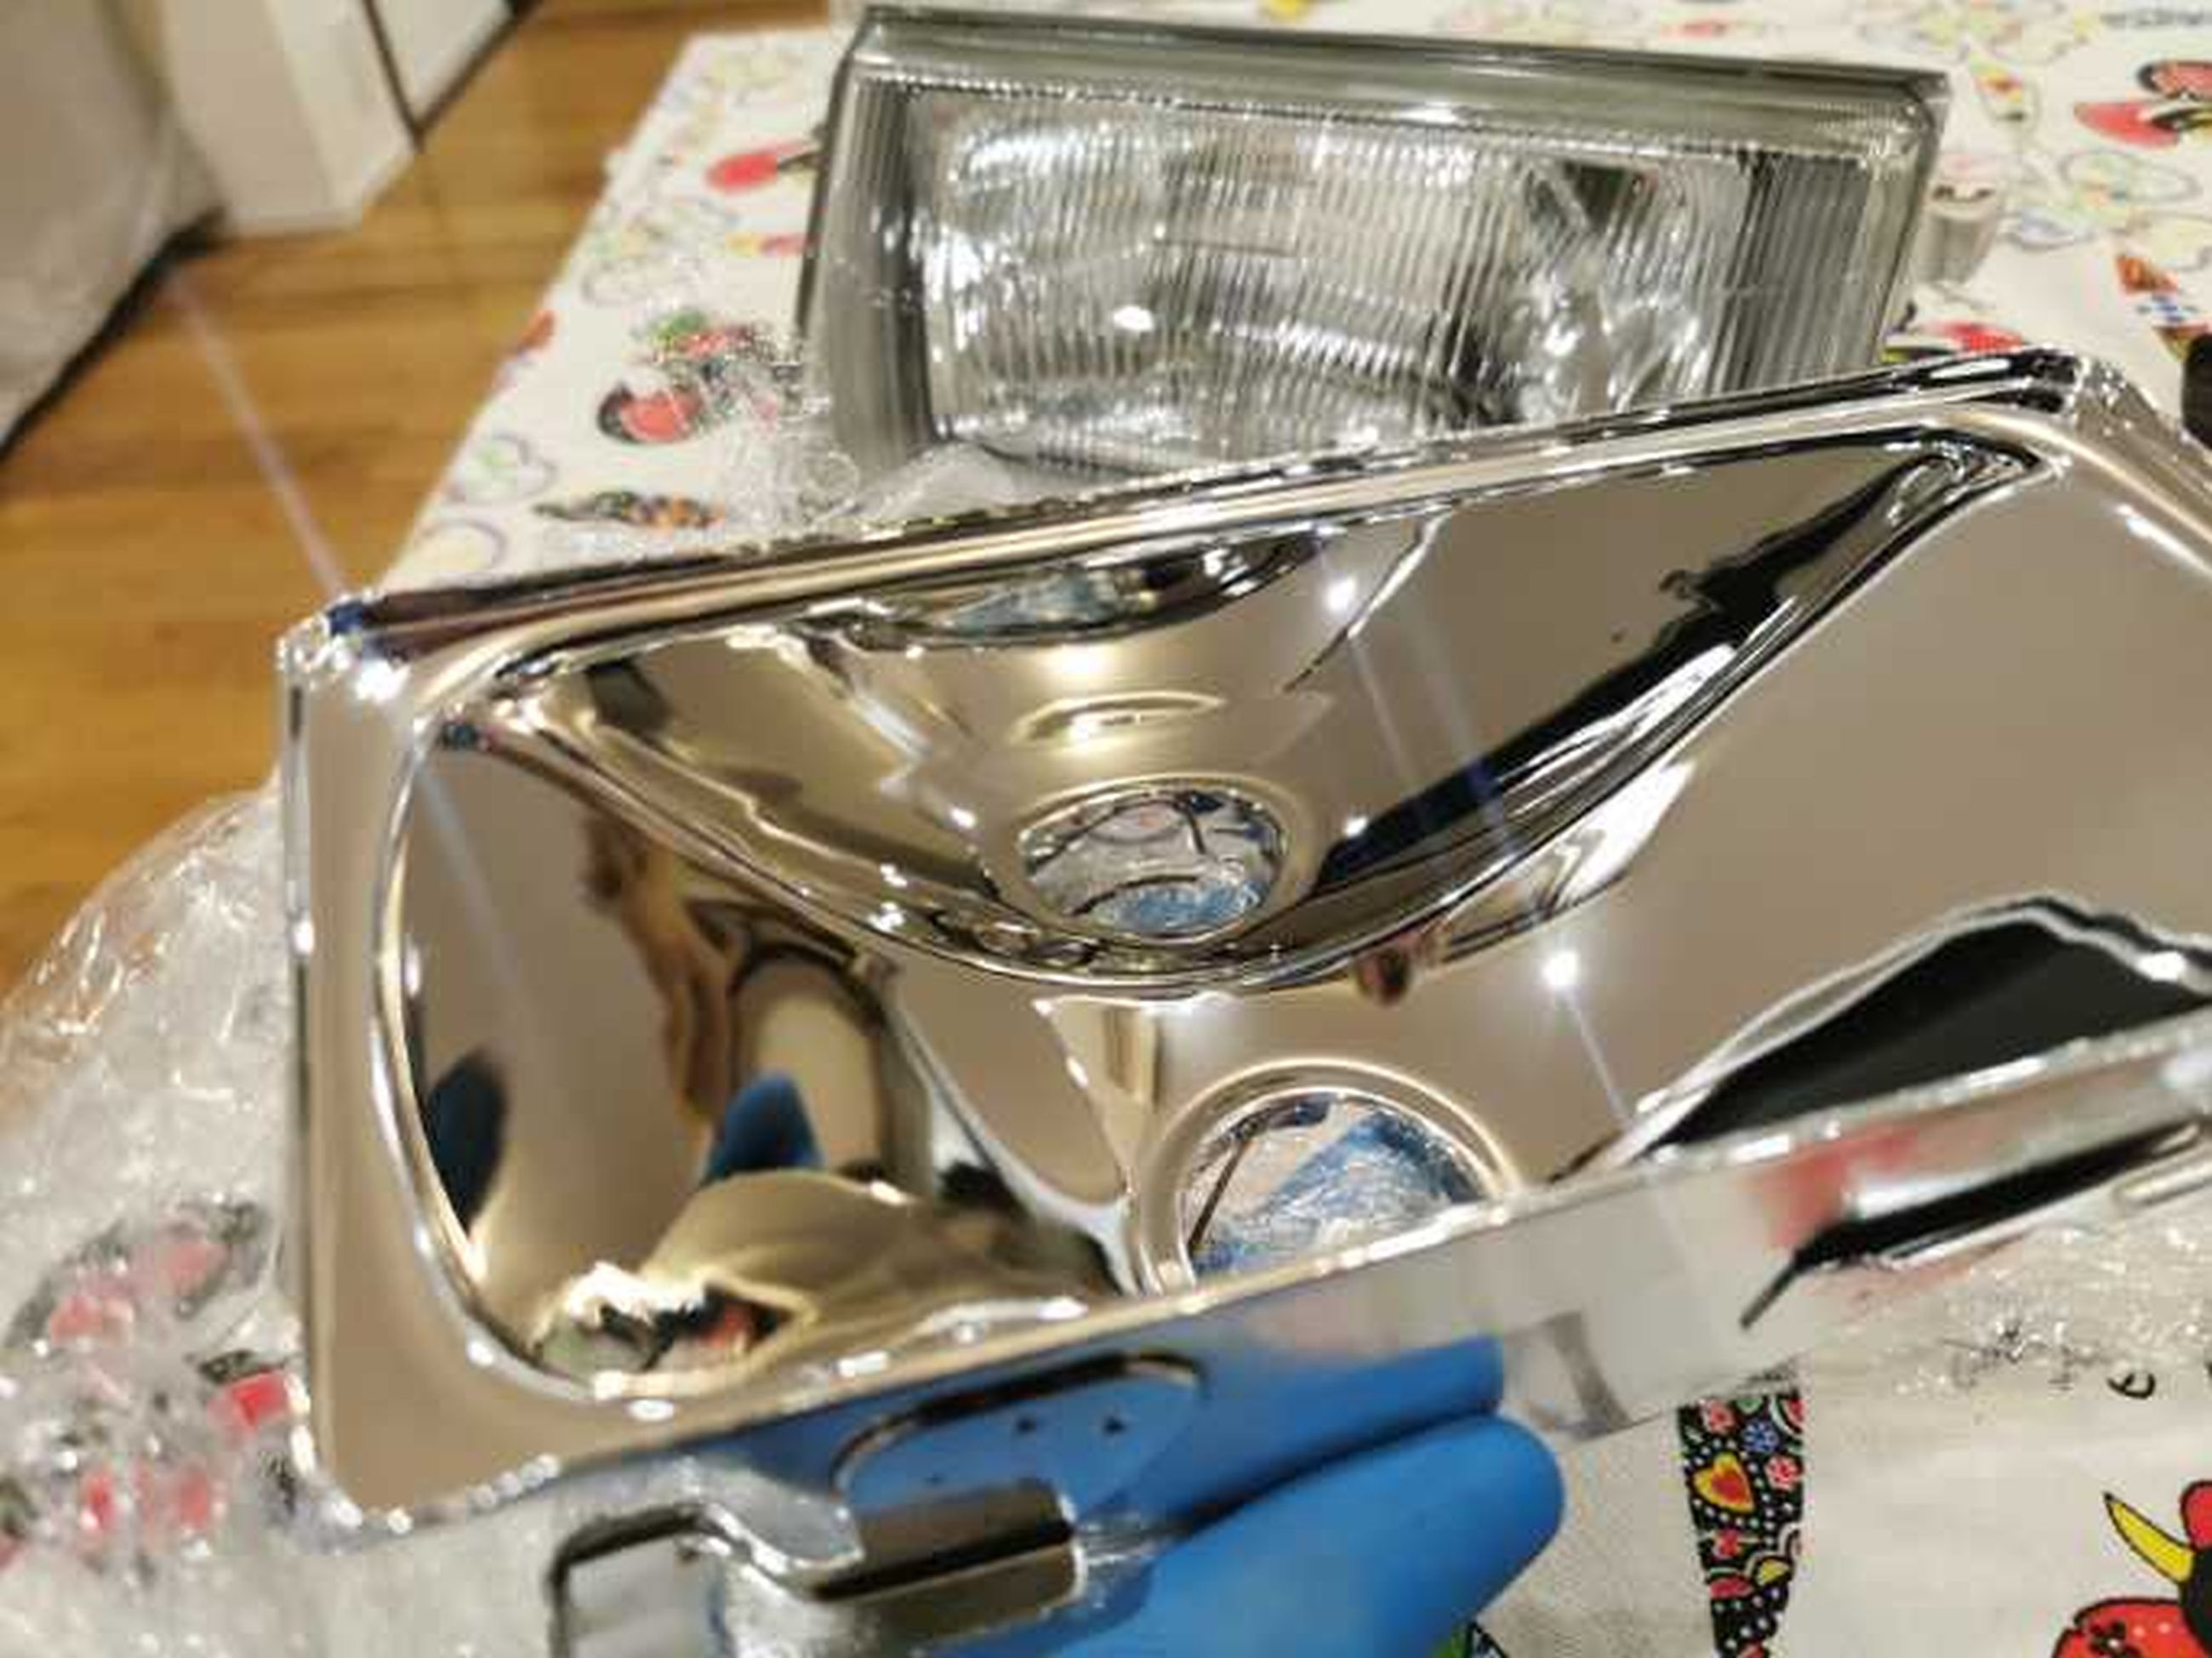
The headlight removed from the car, and superficially cleaned.
My Levin is an early spec model. The late spec model headlights are still available new, so there shouldn’t be any problem with replacing them. For me though, I wanted to keep the car original, and reinstall the original rotating grille, which requires the mounting brackets of the early spec headlights.
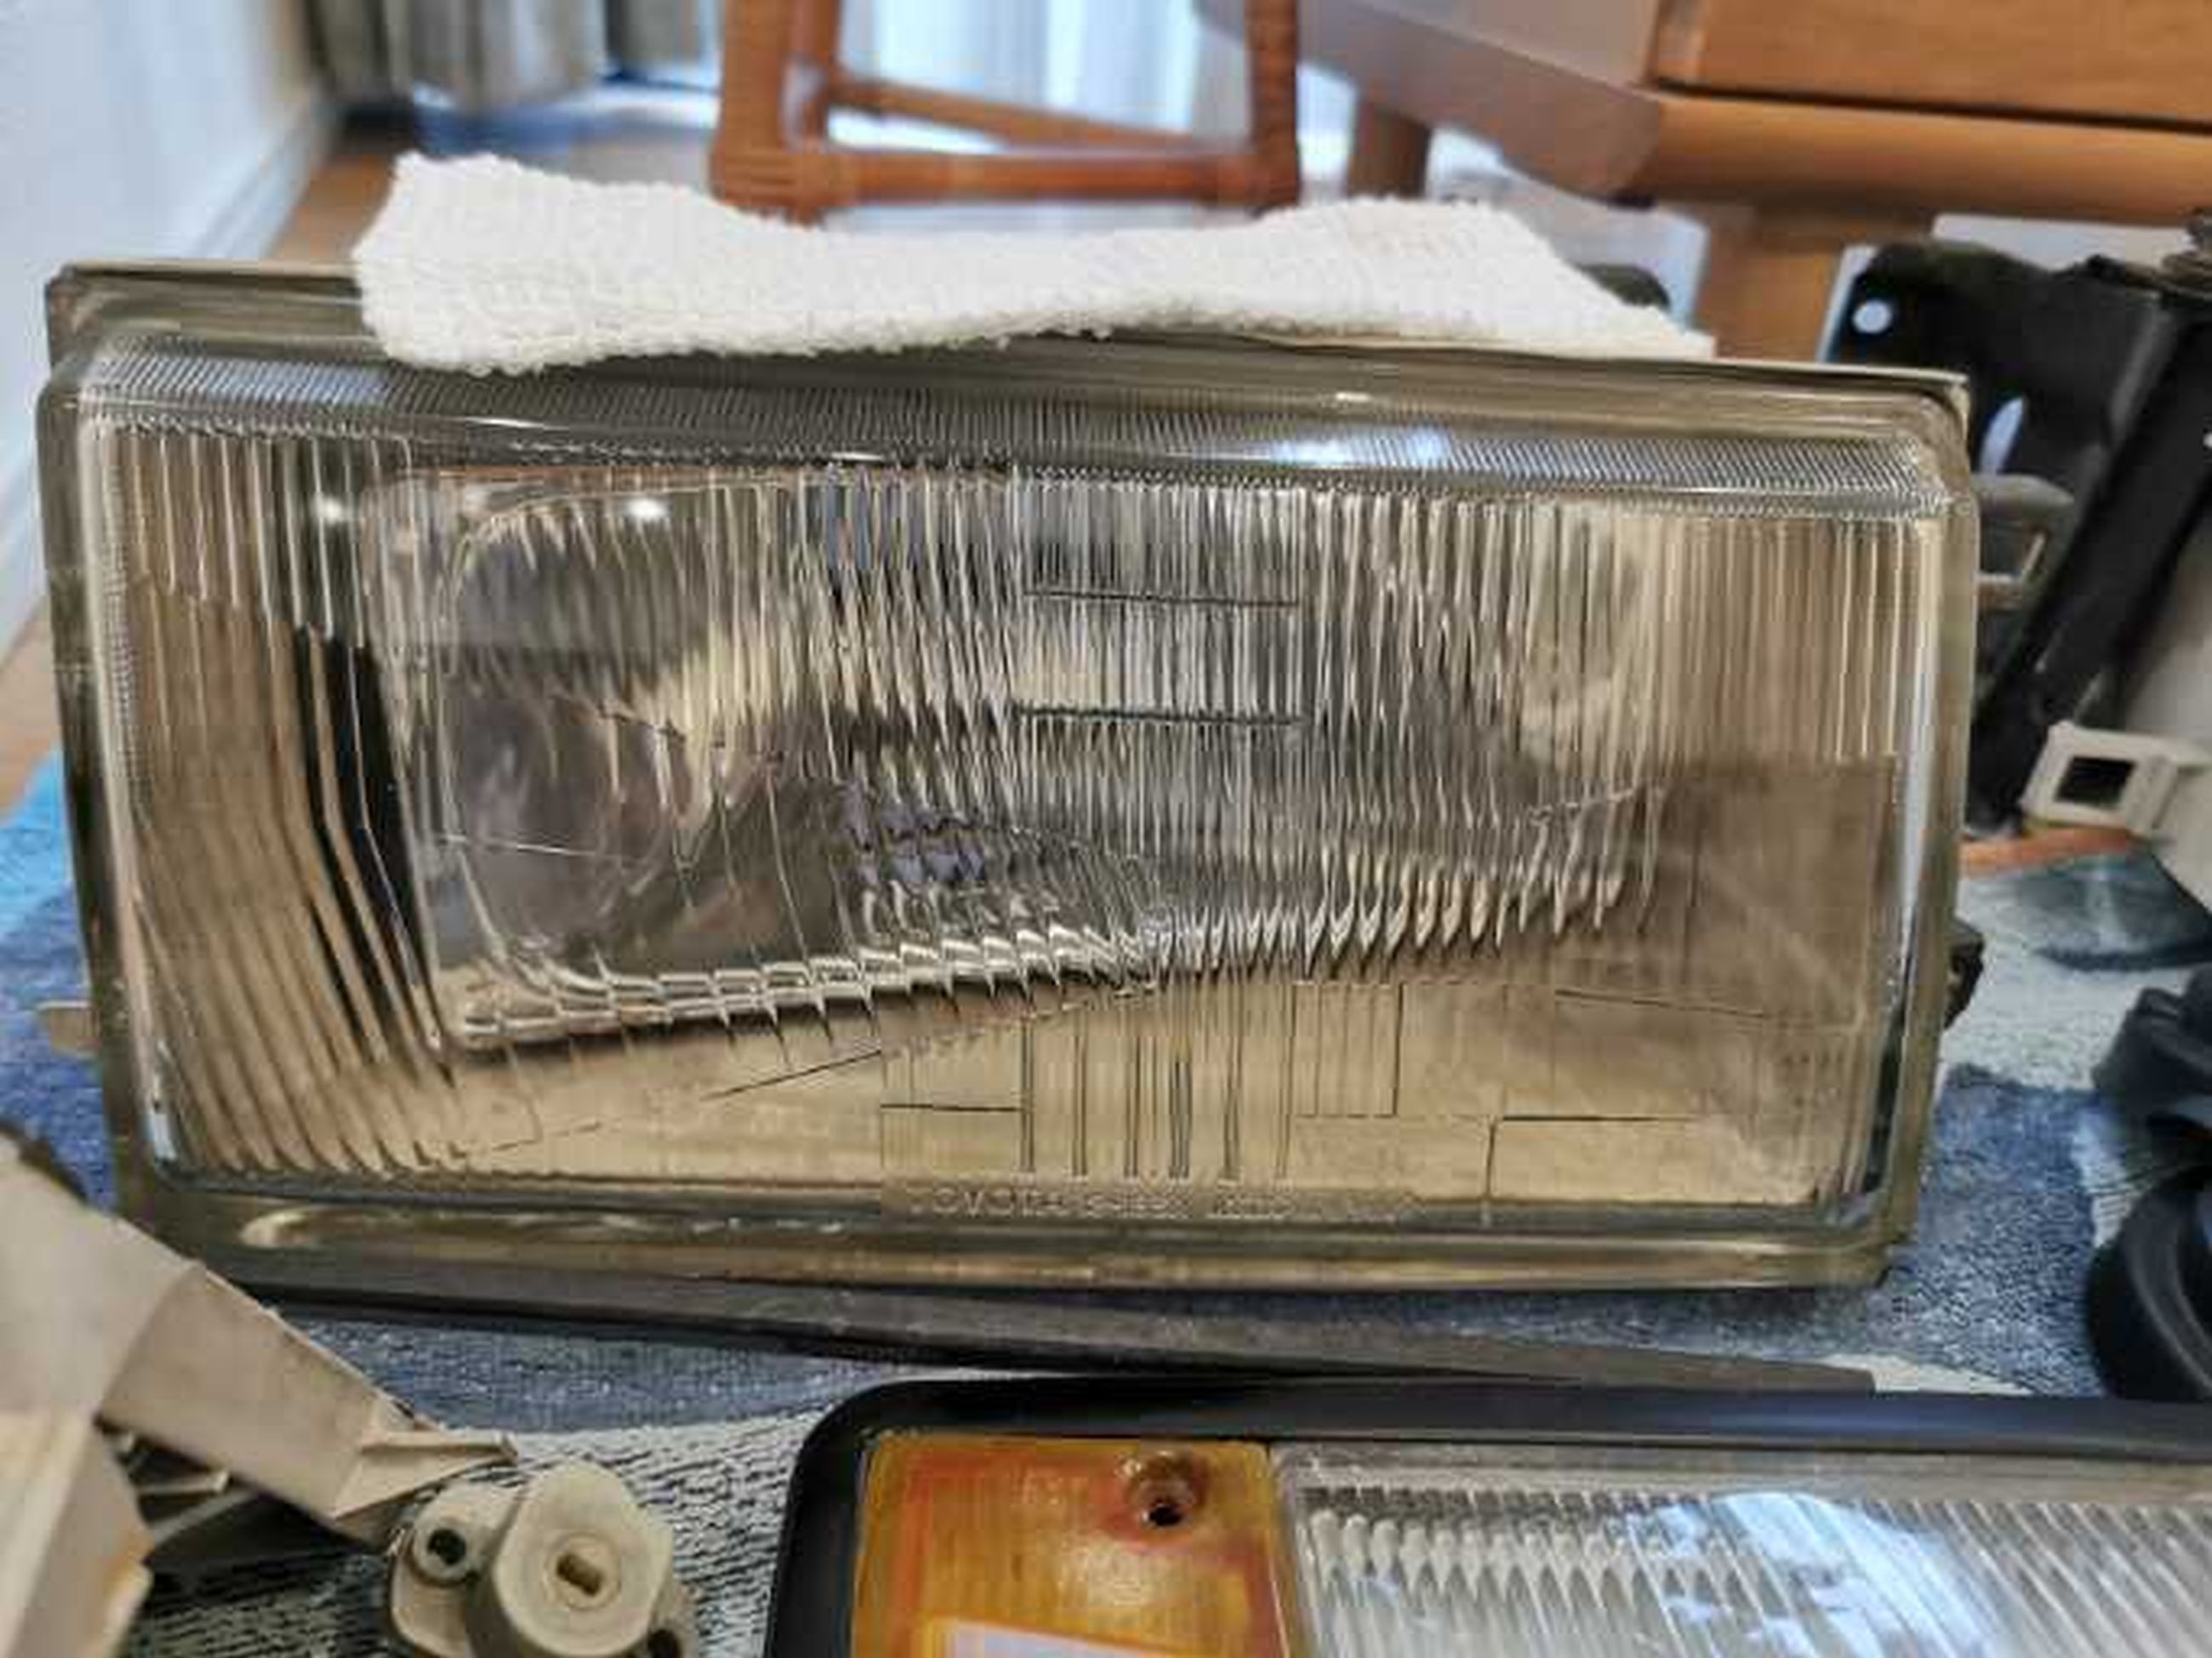
For the old spec model, at least in Japan, good condition headlights are difficult to find, so I decided to rebuild them. My headlight suffered from two main issues:
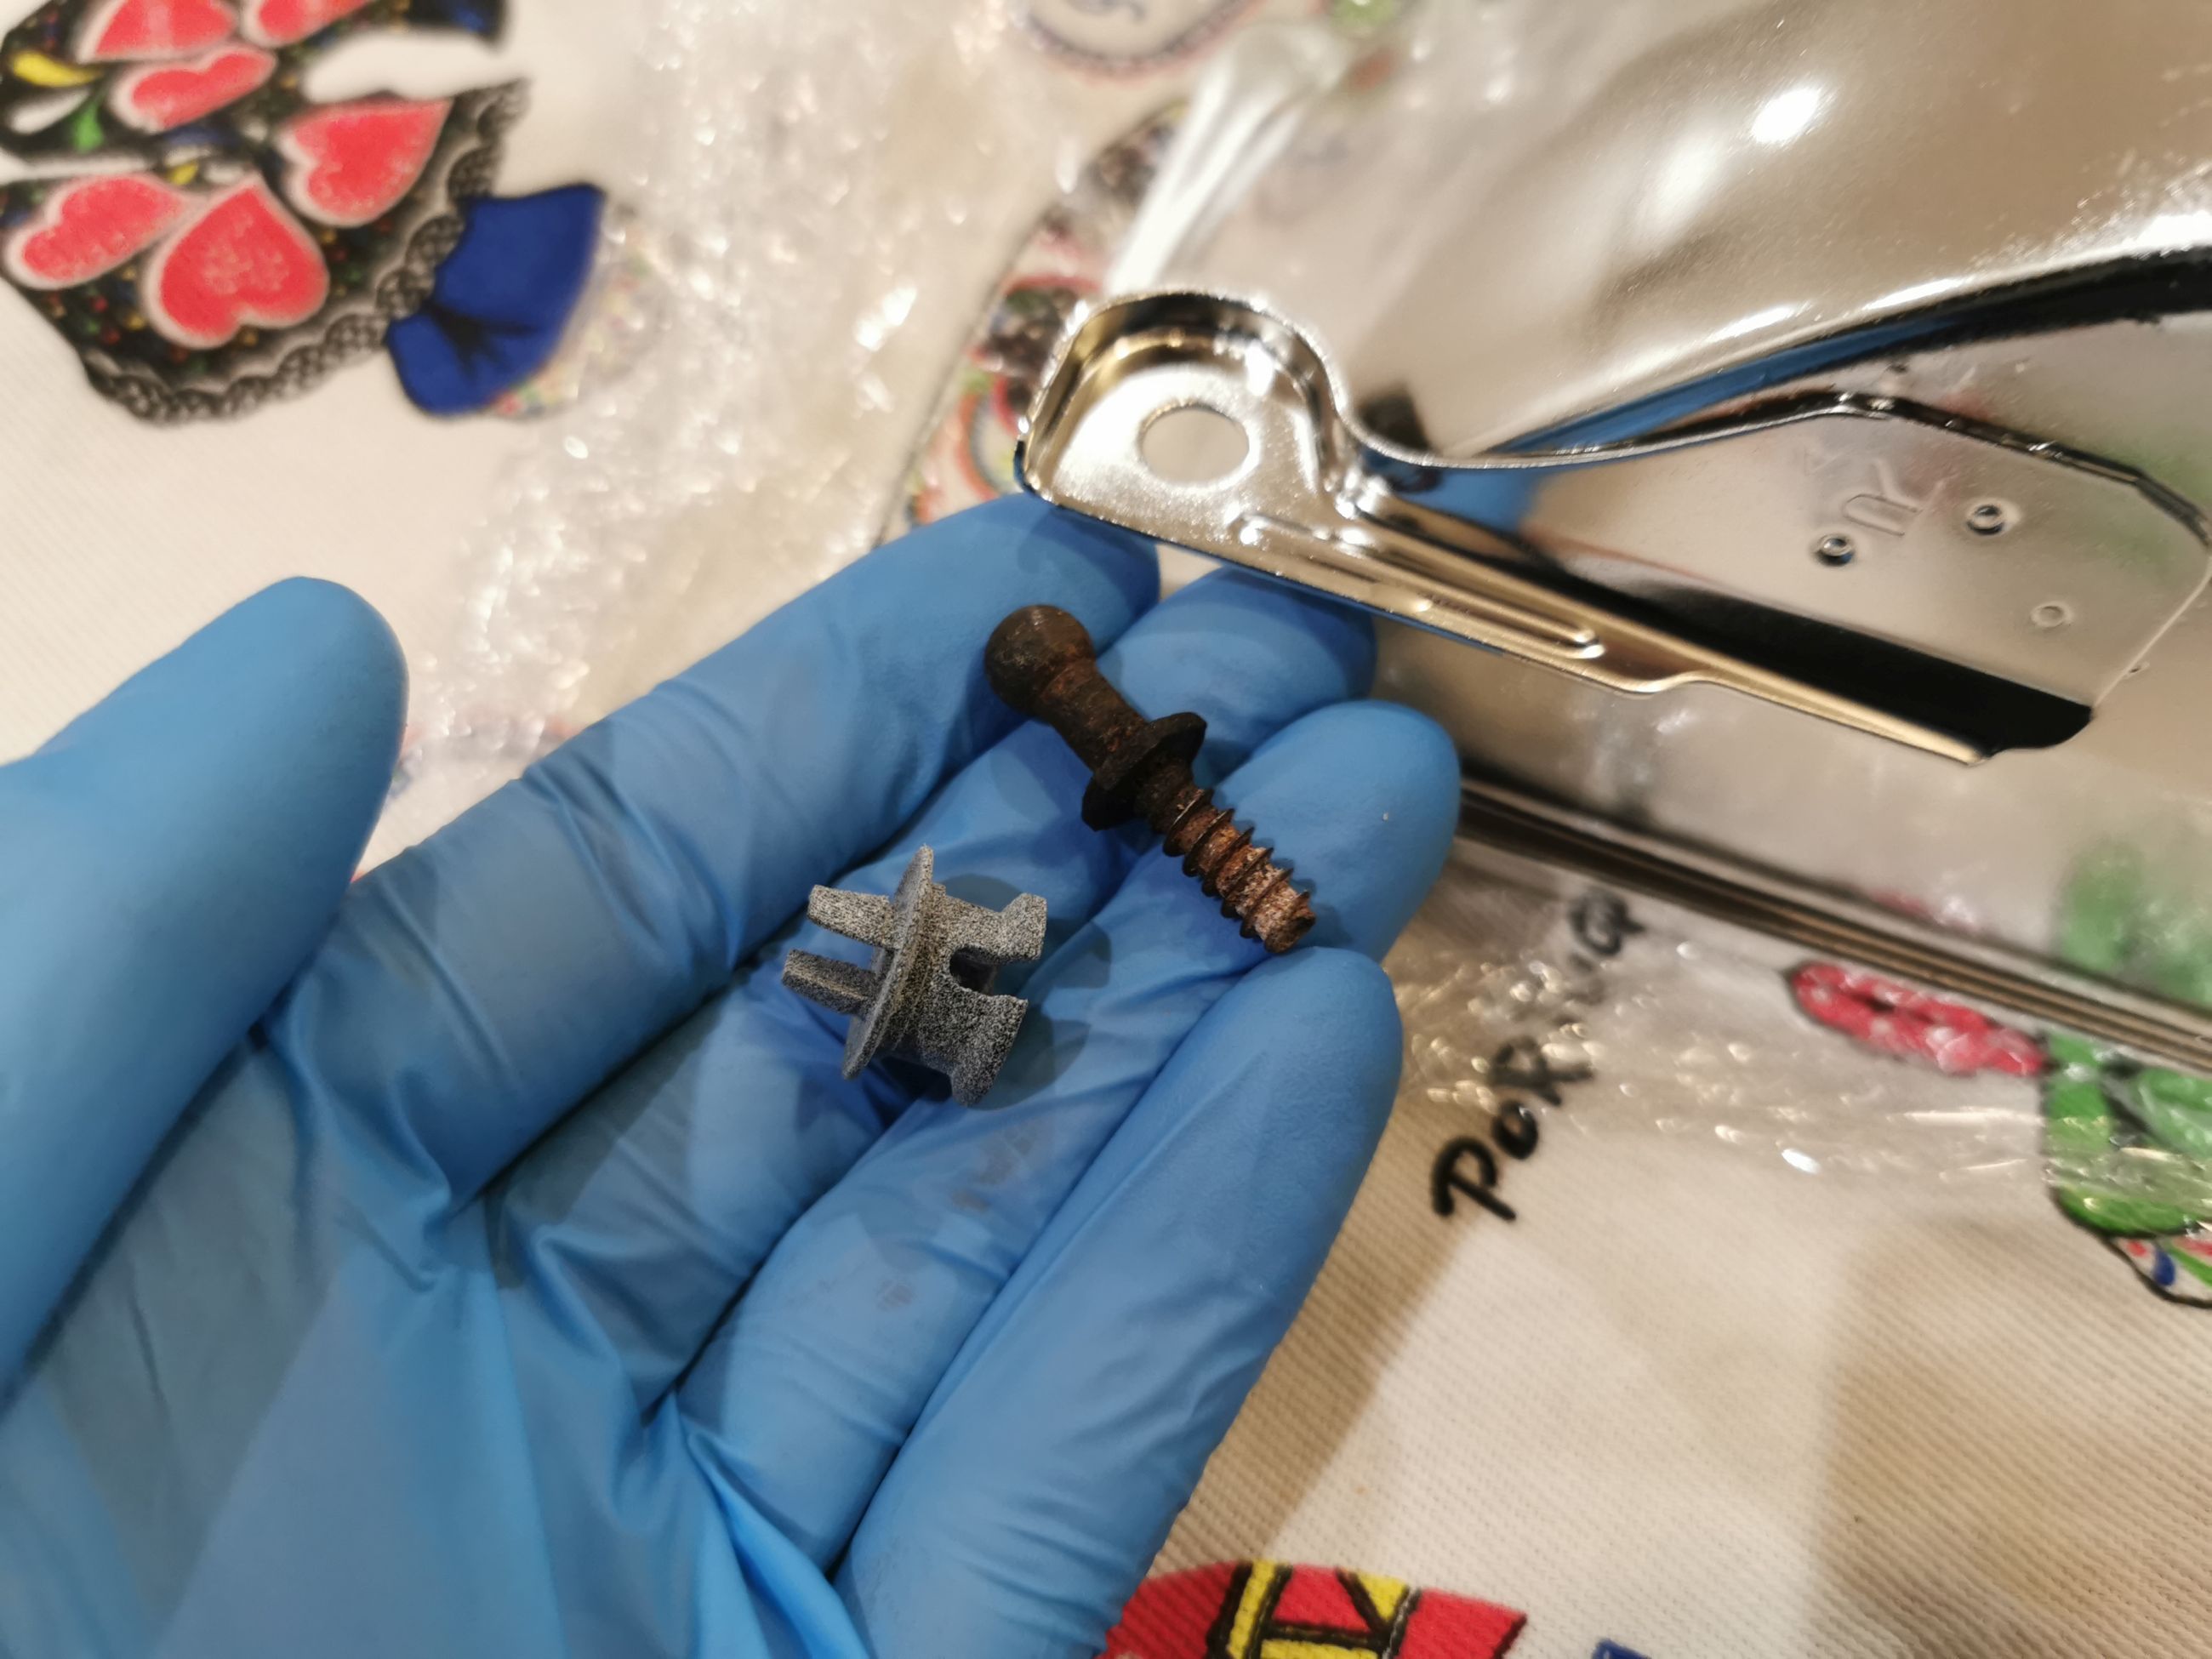
- A plastic mounting clip inside the headlight was broken, causing the reflector to wobble. Also, the headlights couldn’t be adjusted anymore.
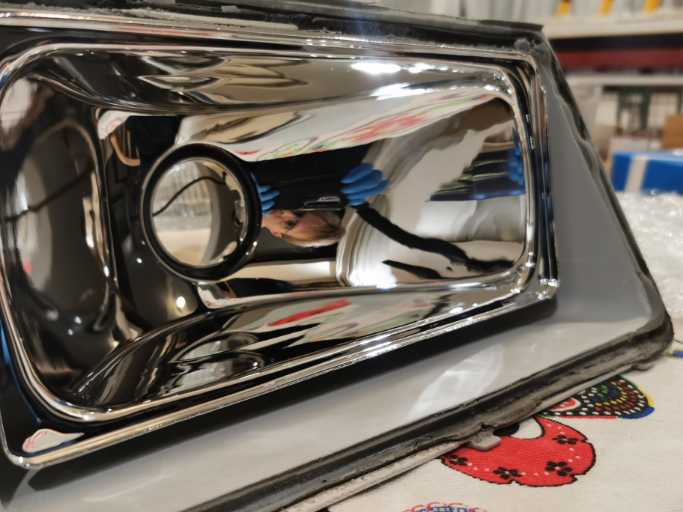
- The reflector itself was damaged, and the aluminum reflective coating was peeling off.
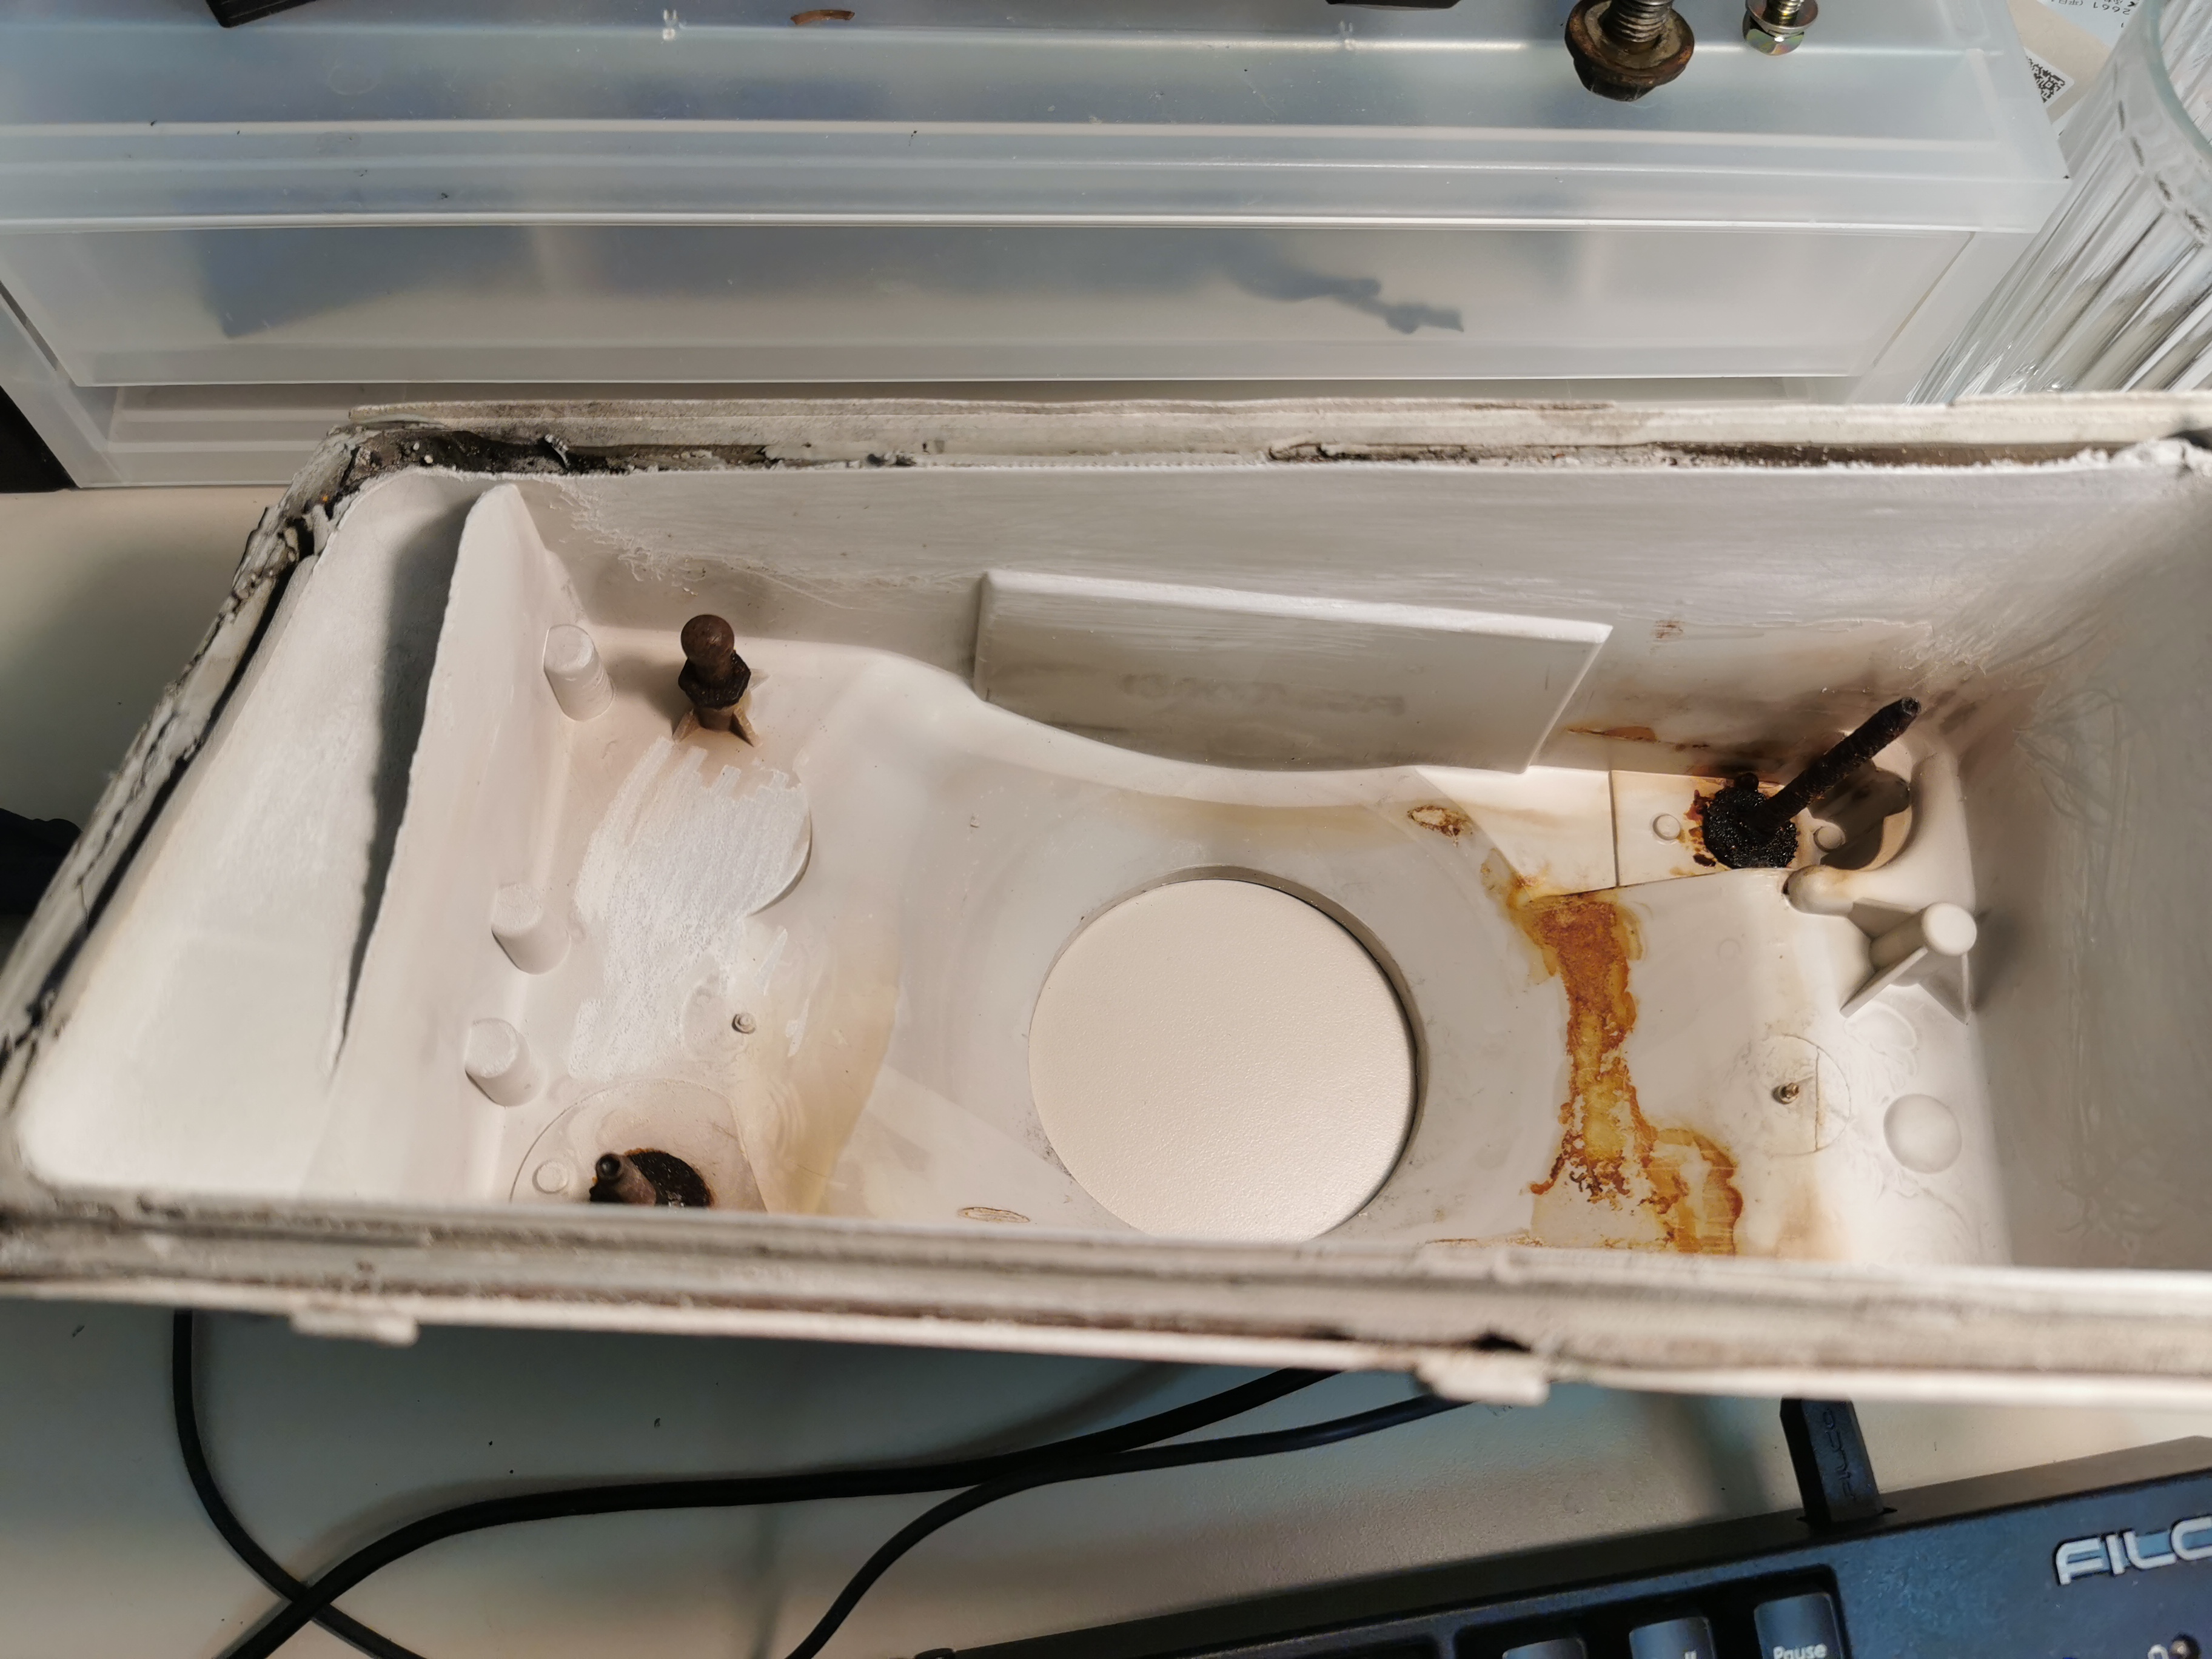
- The plastic in the casing of the reflector has aged, and became yellow, sandy and brittle.
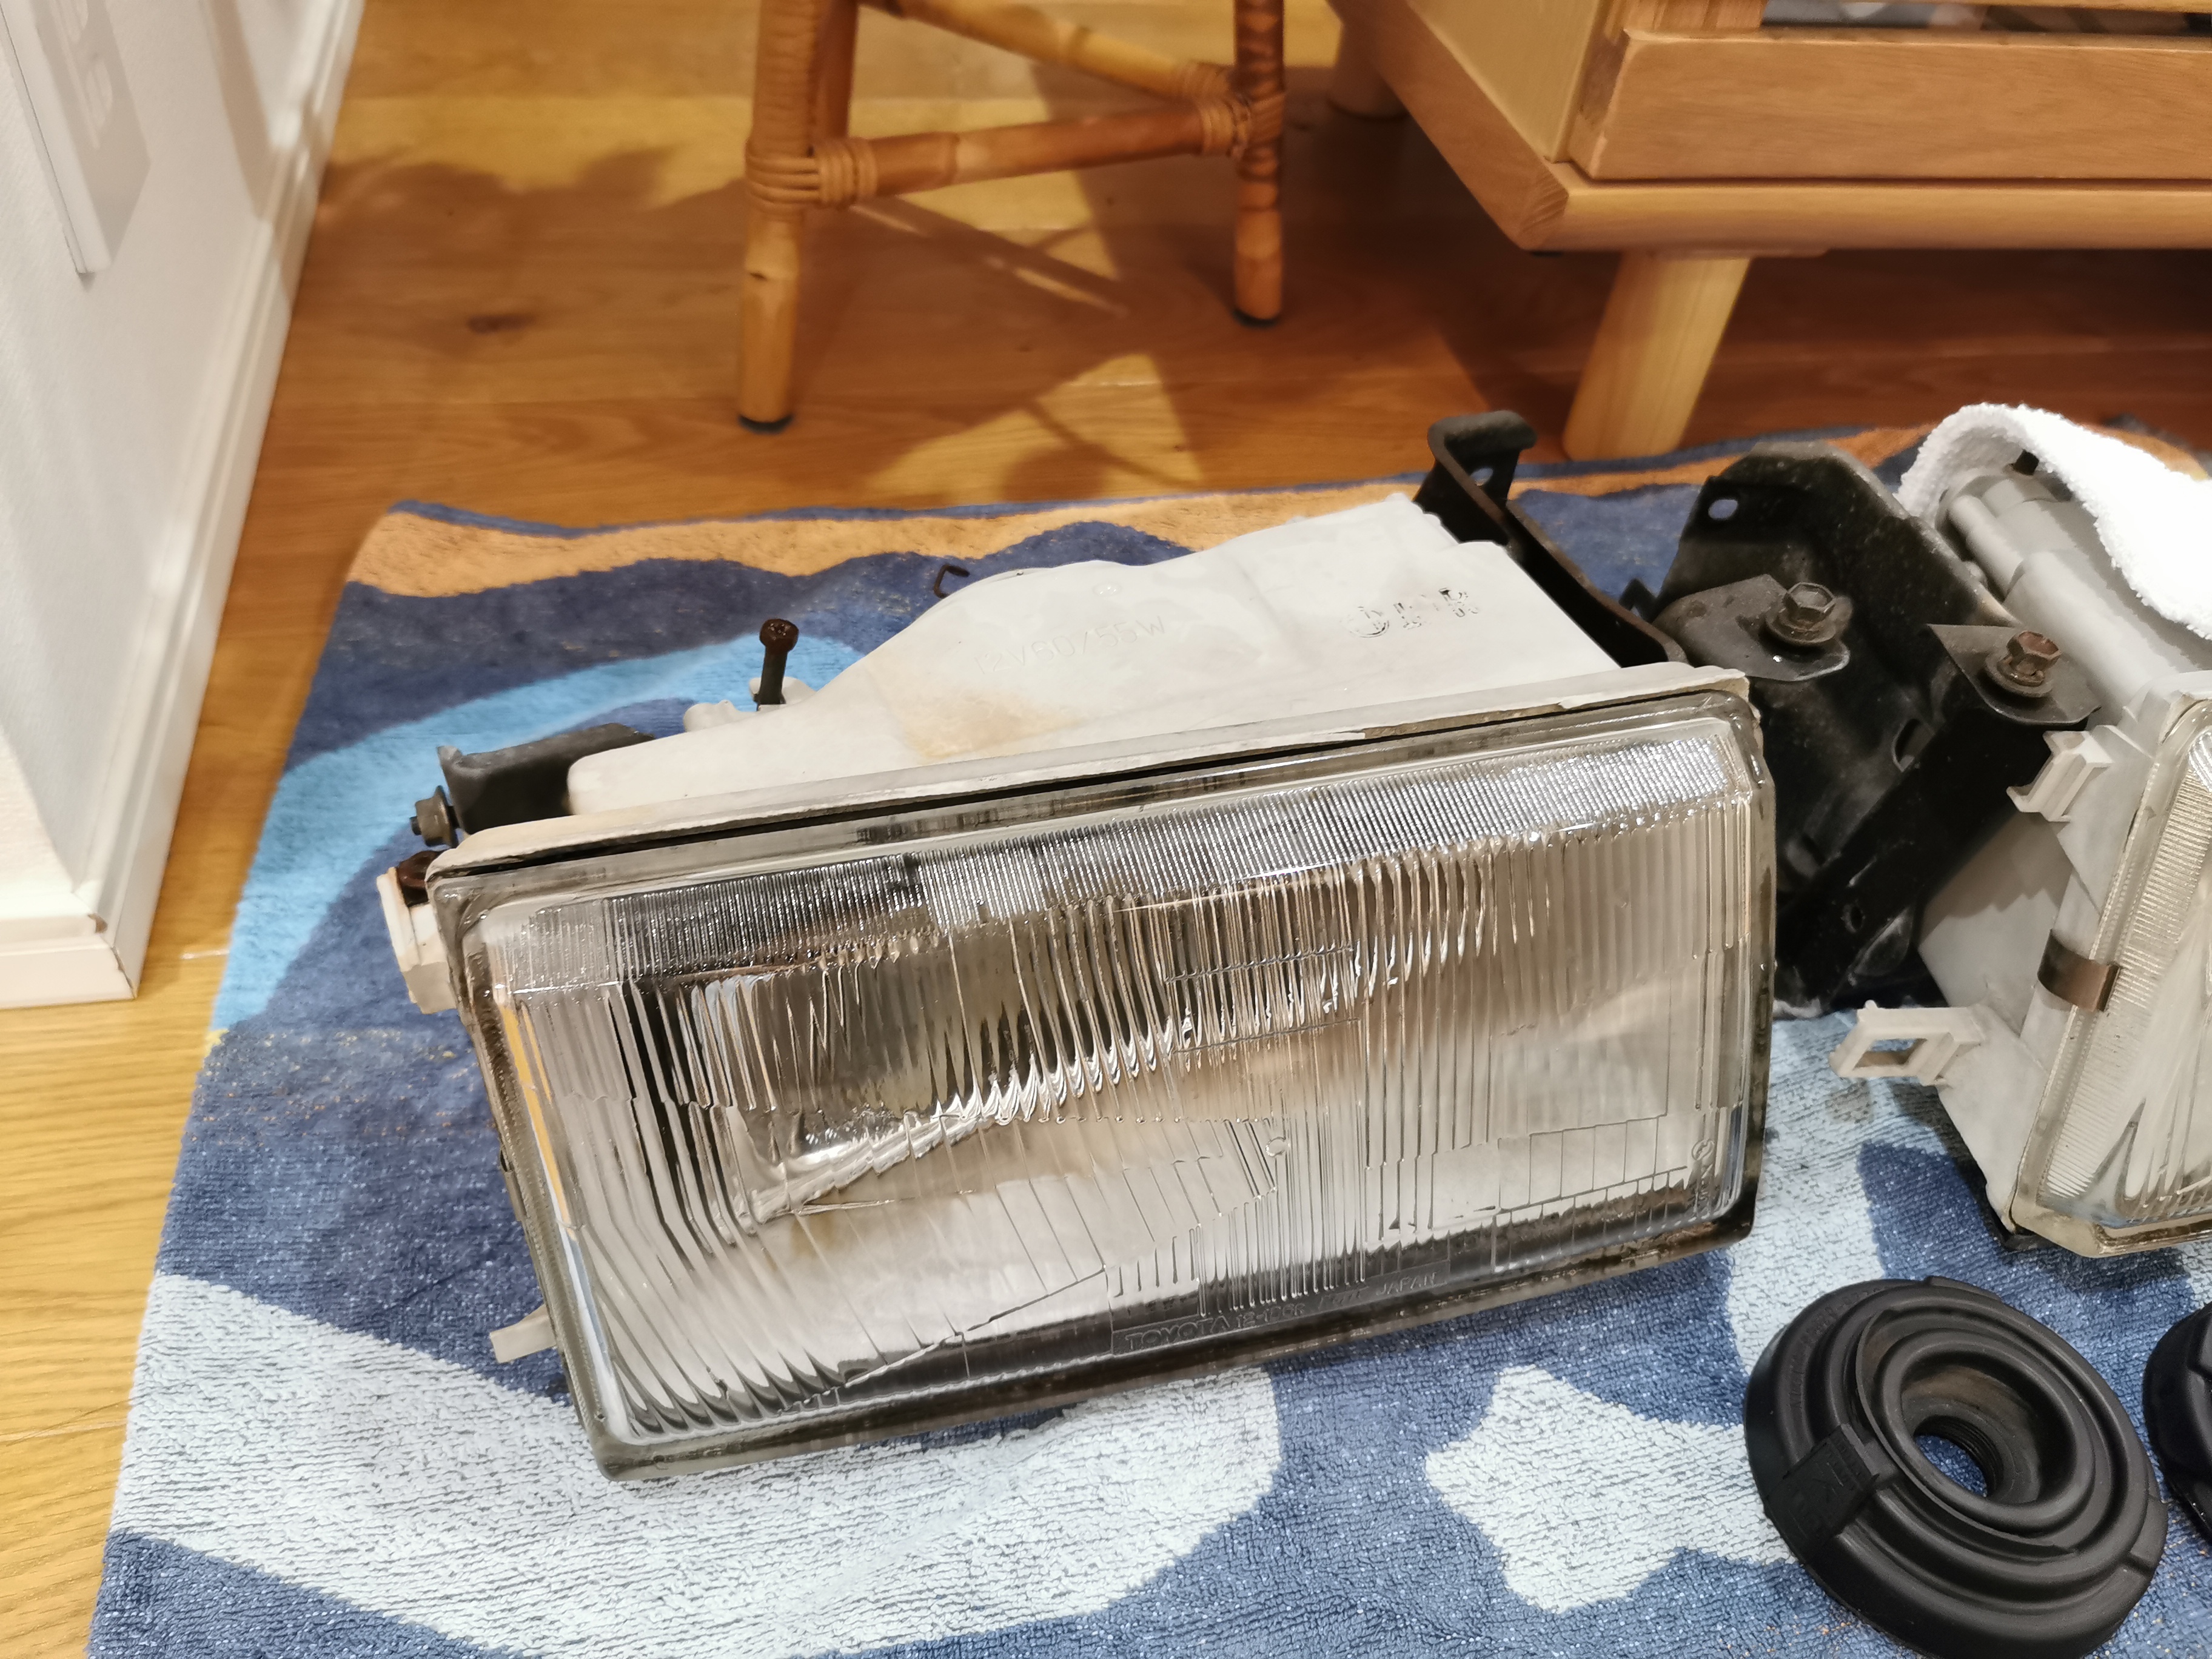
The headlight needs to be opened. Preheat your oven to 110 degrees Celsius, and bake the headlight for about five minutes to soften the glue that holds the front glass in place. You should be able to remove the diffusor glass.
This plastic clip that connects the reflector to a ball joint was broken on all early spec headlights I bought so far.
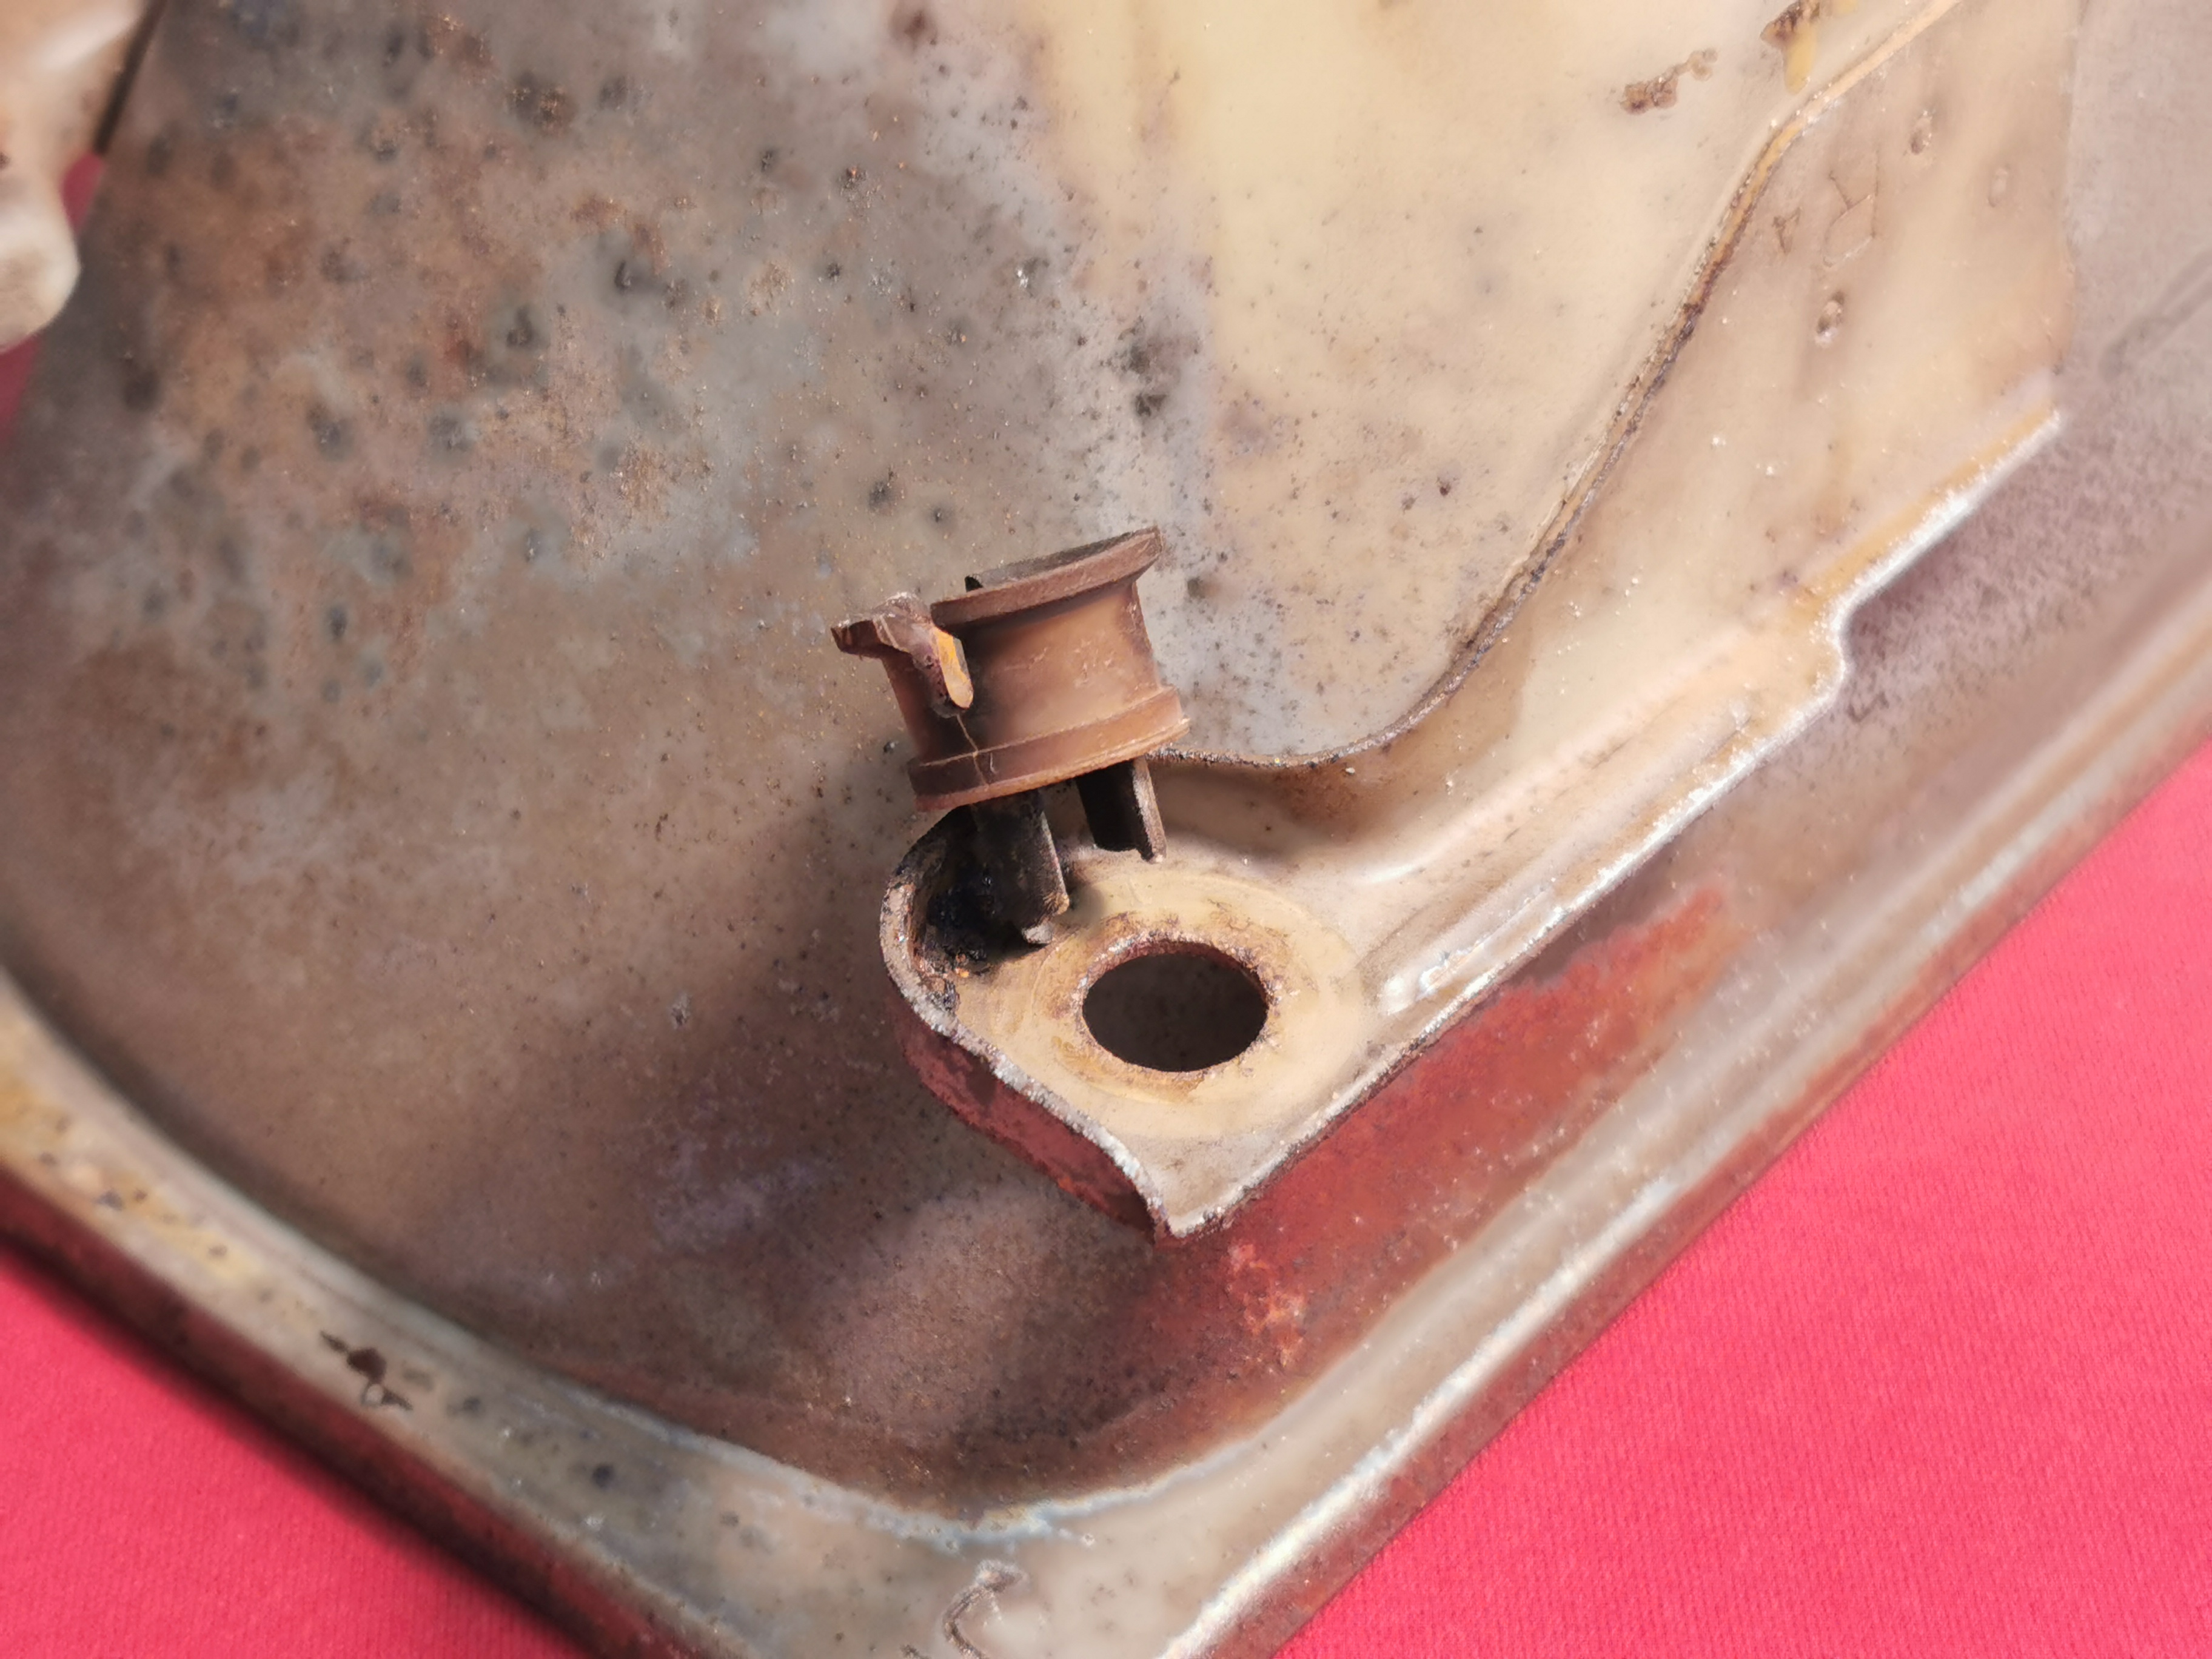
The noses that held this clip into the reflector had chipped off.
This is the headlight case with the (rusty) ball joint in the upper left corner.
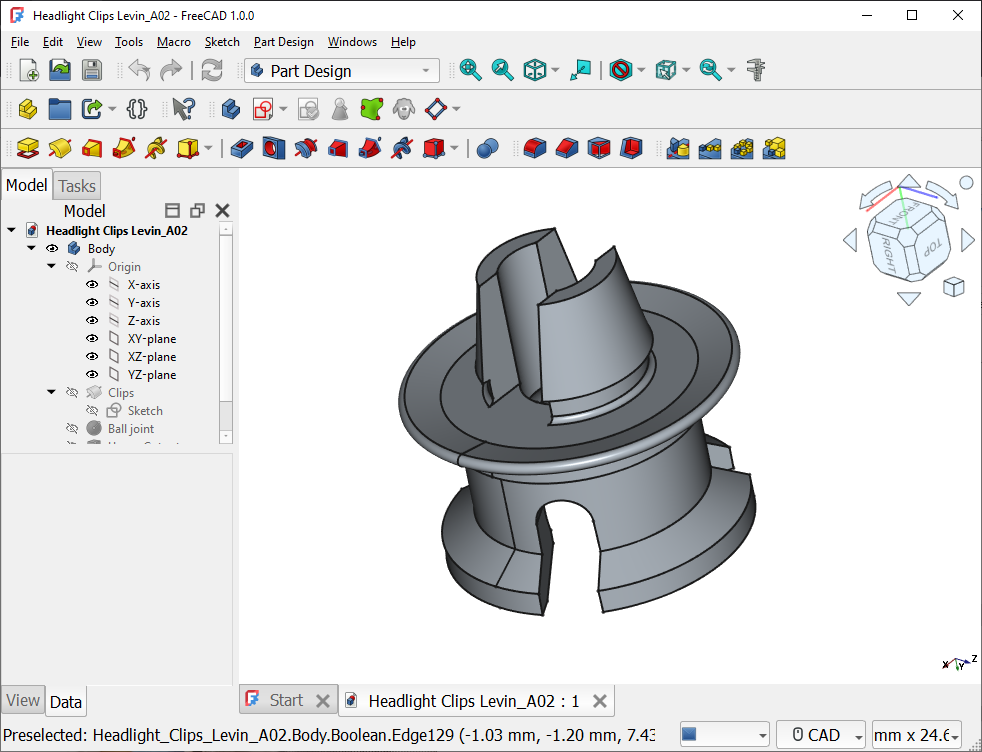
I recreated the plastic clip for 3D printing. For material, I recommend PA11 or PA12 Nylon. It is heat-resistant (important when baking the headlight), and sufficiently strong to resist the heat of the headlight. Do not use ABS, it will melt when assembling the headlight.
I have successfully tested these parts on my own Levin.
Re-coating a reflector is not something you can DIY. Here in Japan, I found Mega Tokai, where I’ve sent my reflectors for re-coating. They
There are two more plastic grommets on the reflector for the adjustment screw gears. As long as they don’t need to be removed, they shouldn’t pose a problem. For my headlights, I will replace them with universal type grommets from AliExpress.